
“Briefly Unavailable for Scheduled Maintenance” can disrupt both site administrators and visitors. This often happens during WordPress updates. WordPress powers over 40% of the websites on the internet, and managing maintenance mode is crucial to minimize downtime and keep users happy. But if you have managed WordPress hosting, you will not have to fix such problems.
Here, you’ll learn the essential steps to resolve and prevent WordPress maintenance mode issues.
QuickFix:
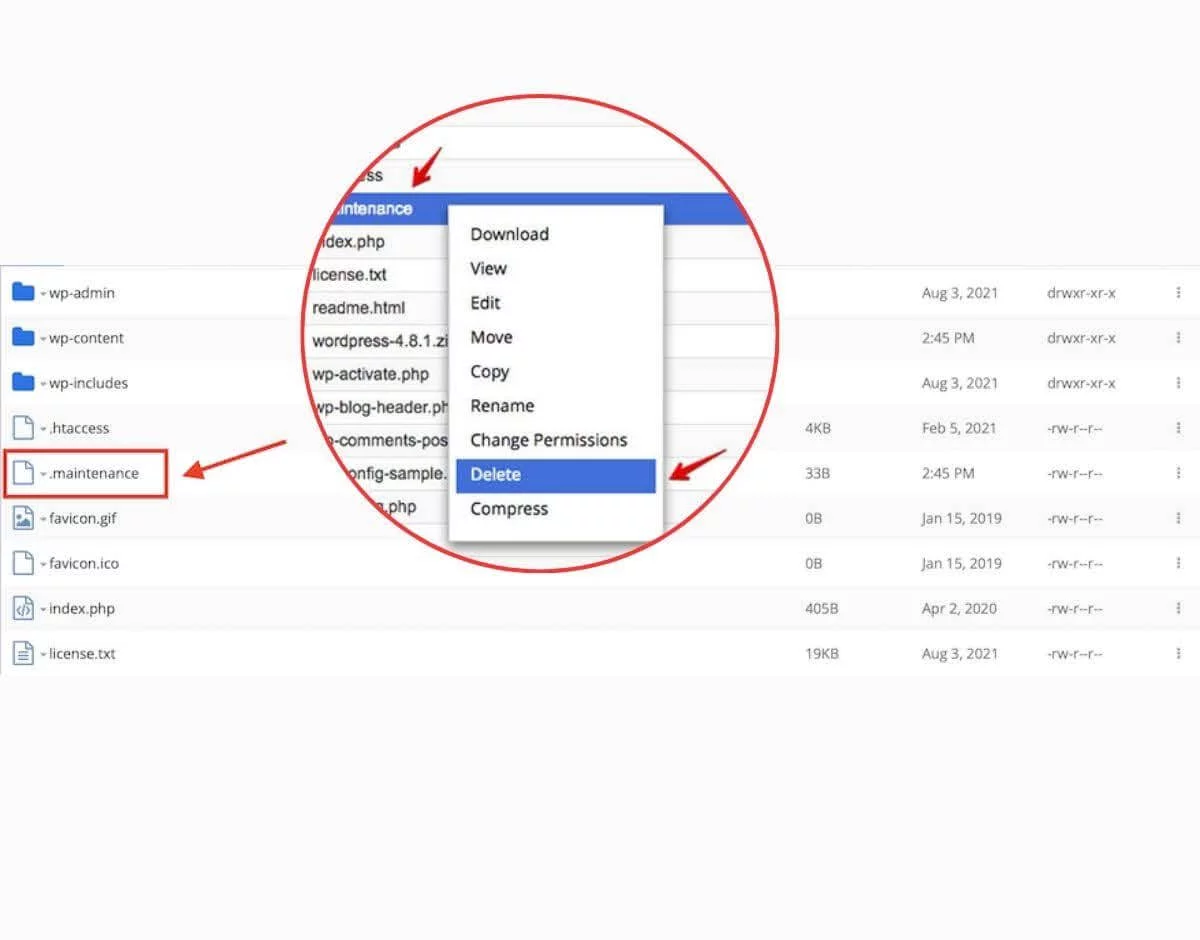
To quickly fix WordPress maintenance mode, access your site’s files via the hosting dashboard and locate the “.maintenance file” in the root directory. Deleting this file will remove your site from maintenance mode. Finally, refresh your website to verify that it’s back online and fully operational.
WordPress maintenance mode is a built-in feature designed to notify visitors that the site is undergoing maintenance, typically due to updates or changes being made to the website. This mode is automatically activated during core updates, plugin installations, or theme changes.
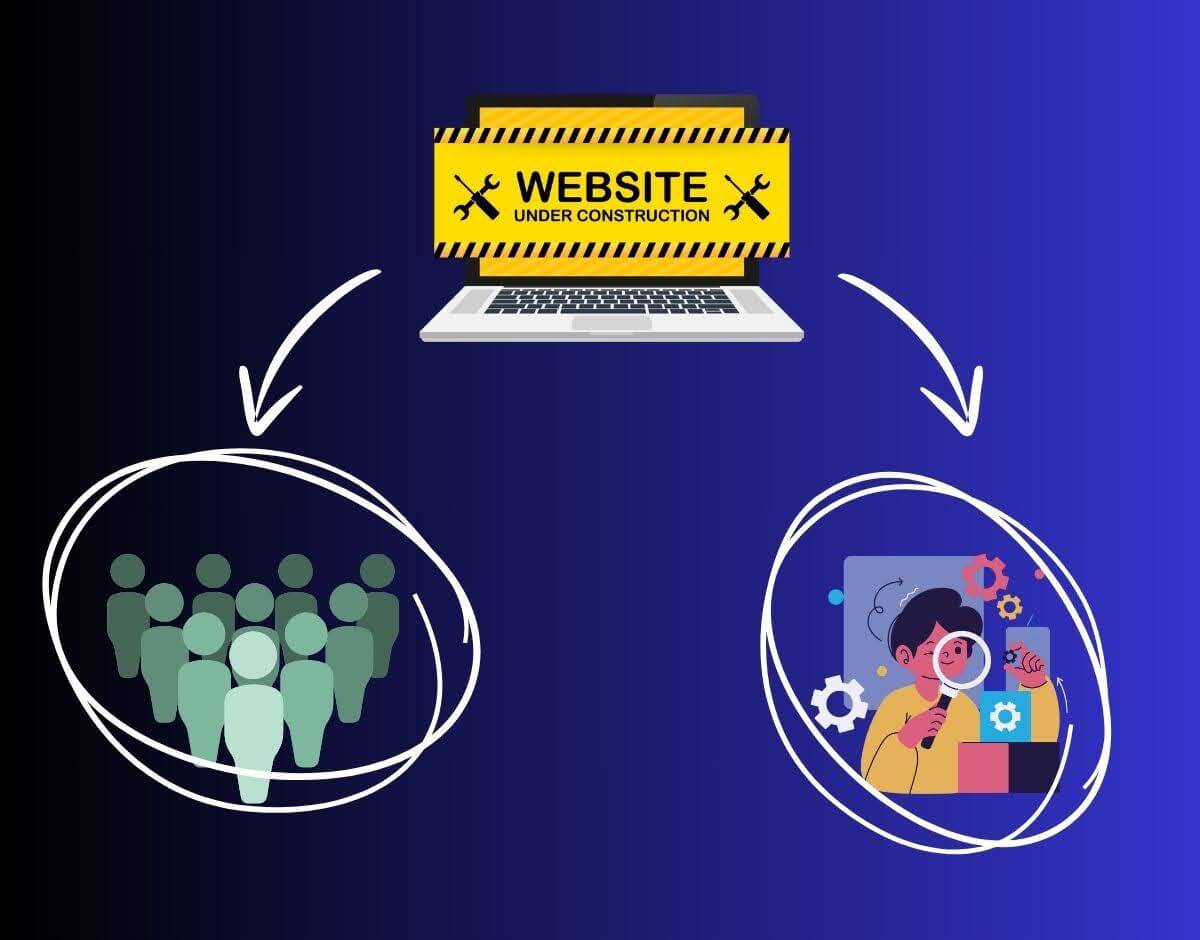
WordPress sites that go into maintenance mode display an automated message alerting visitors that the website is temporarily inaccessible.
Users could become outraged and leave your site altogether; administrators could lose productivity during critical updates that entail significant downtime, leading to substantial financial loss and further disruptions of operations.
Several scenarios can trigger WordPress maintenance mode, including:
During these processes, WordPress creates a temporary .maintenance file in the site’s root directory, signaling that maintenance is in progress. Sometimes, your WordPress changes or updates need to be saved. If you’re also one of them, here is a detailed guide.
When a WordPress site undergoes a WordPress update, it often enters maintenance mode to ensure a smooth transition. However, the WordPress website can sometimes get stuck in maintenance mode, displaying a “briefly unavailable for scheduled maintenance” message.
This maintenance mode error, often caused by a maintenance error in WordPress during the update process, can frustrate WordPress users. To fix the error, one must navigate to the WordPress dashboard, locate the maintenance file that WordPress creates, and delete it.
When WordPress updates or installs plugins, it enters maintenance mode, creating a .maintenance file. Occasionally, this process is interrupted, leaving the site in maintenance mode. This section provides a professional and detailed guide to resolving this issue by deleting the .maintenance file.

Here are certain precautions one should take before working on a website’s backend files that are briefly unavailable for scheduled maintenance.
Following these steps can quickly restore your website from maintenance mode.
Updating the wp-activate.php file can be an effective solution to resolving the WordPress maintenance mode issue. However, this method involves accessing and editing a core WordPress file, so it’s essential to proceed cautiously to avoid any potential disruptions to your site. Ensure your server is optimized for WordPress with our virtual private server. This can help prevent interruptions during updates.
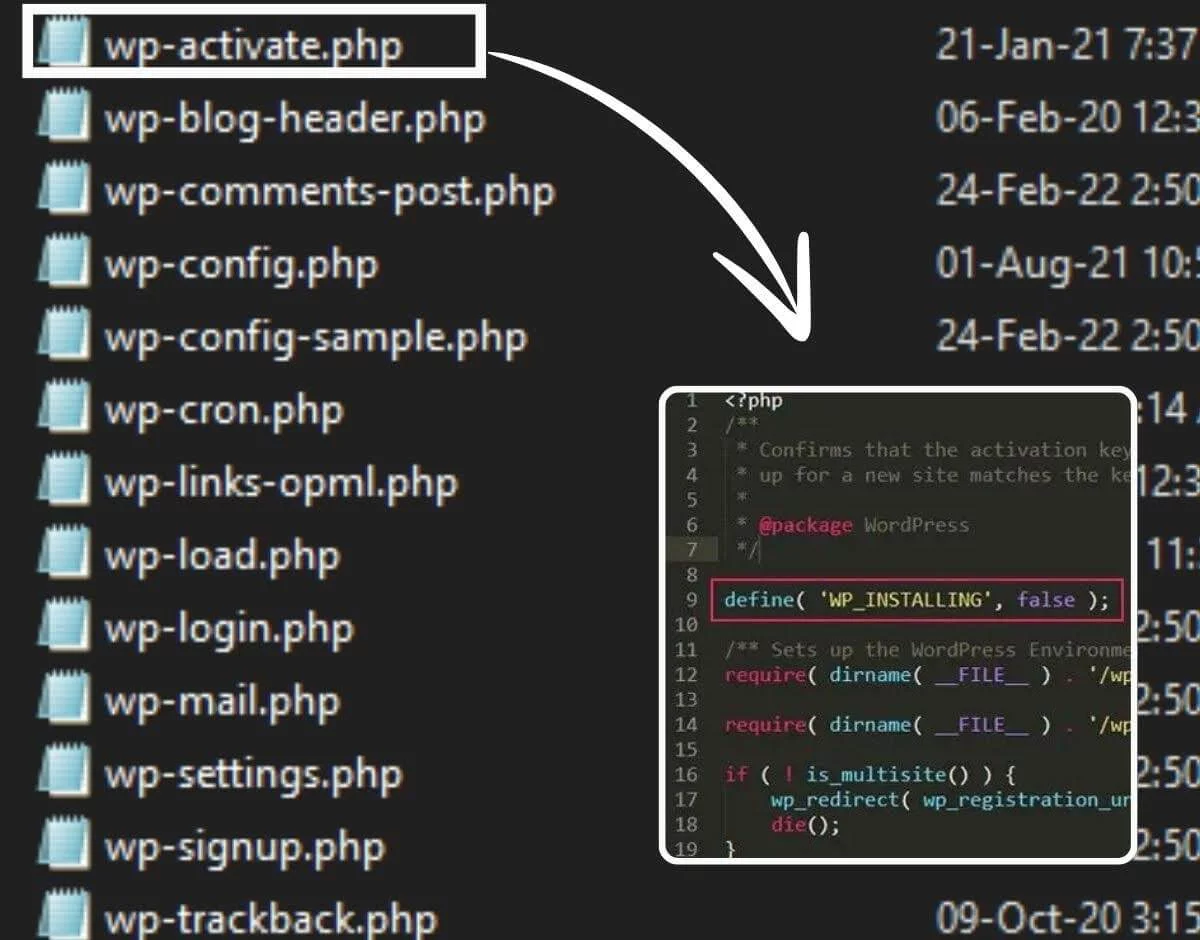
| <?phpdefine(‘WP_INSTALLING’, false);// Rest of the existing code follows |
Updating the wp-activate.php file is a practical method to troubleshoot and fix the WordPress maintenance mode issue.
One of the common triggers for WordPress maintenance mode issues is conflicts or errors caused by plugins. Temporarily deactivating all plugins can help identify if a plugin is causing the problem. Here’s how to do it:
Access Your Website via FTP: Connect to your server with FileZilla. This method ensures you can deactivate plugins even if locked out of the WordPress dashboard.
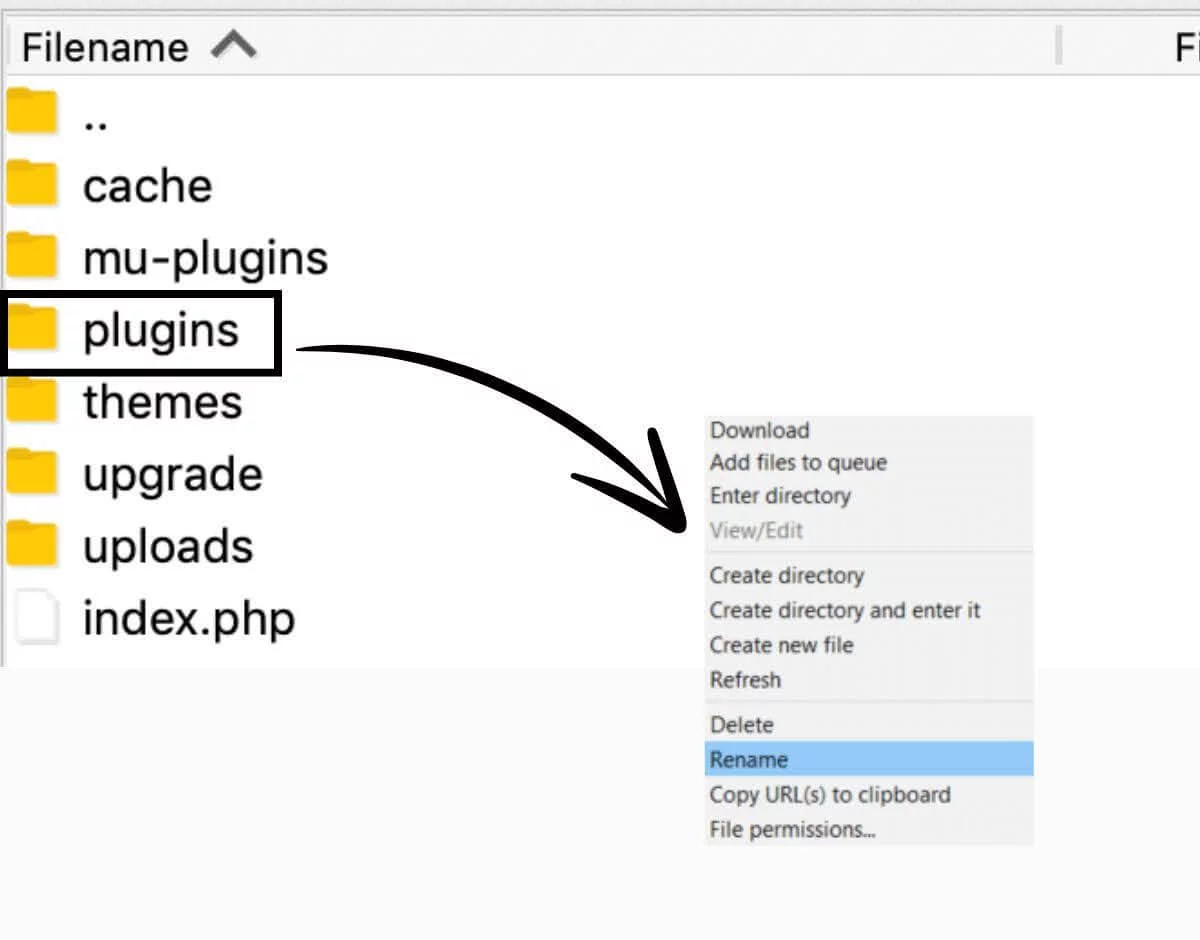
Navigate to the Plugins Directory: find the wp-content folder and open the plugins directory. This folder contains all installed plugins.
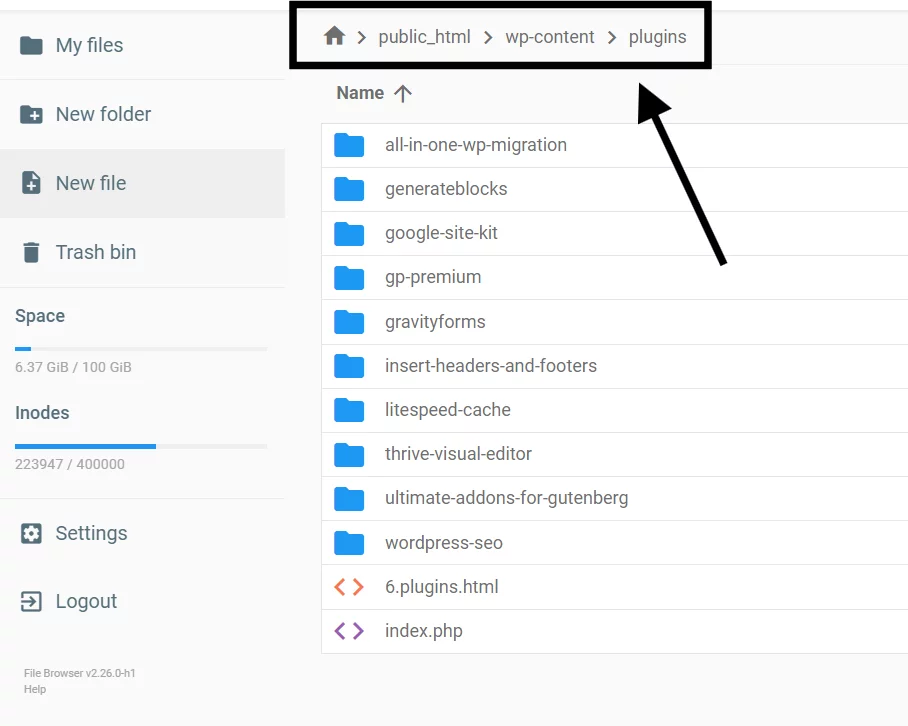
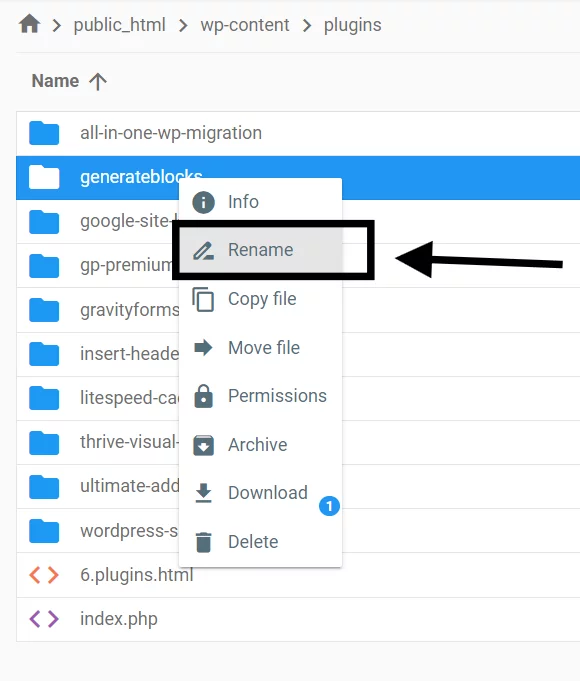
Rename the Plugins Folder: Rename the entire folder to something like plugins_deactivated. This action will deactivate all plugins without deleting them.
Check Your Website: Check your website to see if the maintenance mode issue has been resolved. A plugin is likely the culprit if the site is back to normal.
Reactivate Plugins One by One:
Identify the Problematic Plugin: Once you find the plugin causing the issue, keep it deactivated and contact the developer for support, or look for an alternative plugin offering similar functionality.
Managed Services: Sometimes, plugin conflicts can trigger maintenance mode.
Preventing WordPress maintenance mode errors is crucial for site uptime and user experience. Here are some best practices and strategies to help you avoid encountering this issue:
WordPress is often vulnerable to attacks and spam threats; there is also a detailed guide on preventing brute-force attacks in WordPress, which can be highly beneficial.
When your WordPress site enters maintenance mode, visitors may encounter a generic notification, which can be disconcerting. Customizing this notification enhances the user experience, communicates professionalism, and reassures visitors that your site will return shortly.
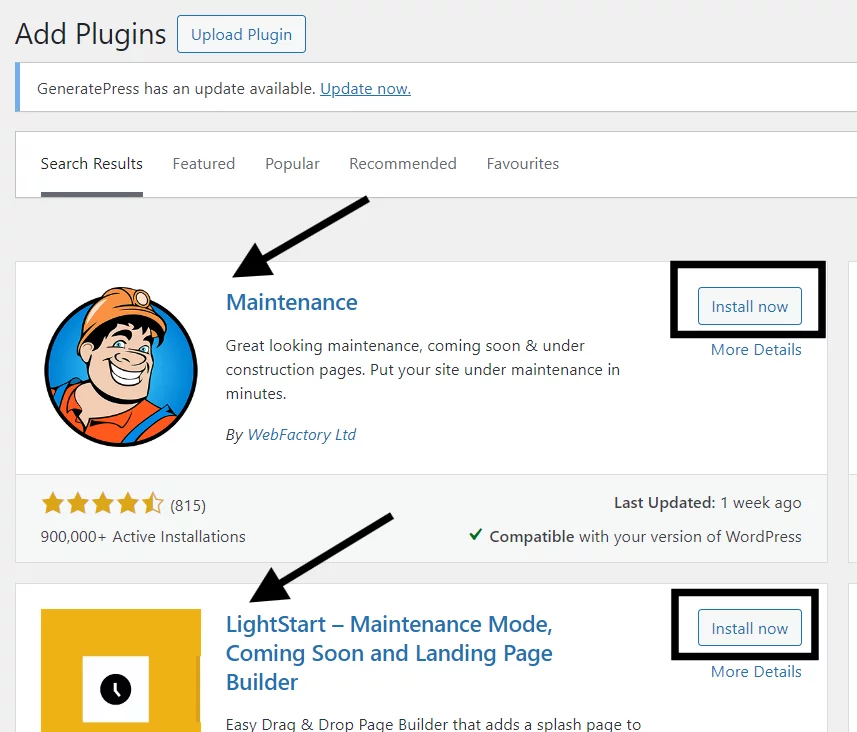
1. Install a Maintenance Mode Plugin
2. Add Branding Elements
3. Activate Maintenance Mode
Most people face the fatal error “max execution time exceeded” when they turn off the maintenance mode. But don’t worry—we have you covered here, too.


Customizing your maintenance mode page can significantly improve user experience during downtime. With a cPanel lifetime license, you can easily access various tools and features that simplify creating a personalized and informative maintenance page.
Optimizing your hosting environment minimizes WordPress maintenance mode errors and ensures a seamless user experience. A well-optimized hosting setup supports WordPress’s unique demands and enhances overall site performance and reliability.
Choosing a hosting provider that understands and caters to the specific needs of WordPress is vital. Providers offering WordPress-specific optimizations can significantly reduce maintenance-related issues. For instance, managed WordPress hosting services often include features like automatic updates, built-in caching, and enhanced security protocols.
Managed WordPress hosting services provide a tailored environment optimized for WordPress, handling technical details such as server management, security, and updates. These services are particularly beneficial for users without extensive technical knowledge, ensuring that the site remains up-to-date and secure without manual intervention.
Managed hosting services also often include automatic backups and one-click restore options, saving significant time and preventing data loss in case of issues.
Server-side caching is another powerful tool to enhance your WordPress site’s performance and stability. By storing frequently accessed data in the server’s memory, caching reduces the load on the server and speeds up content delivery to users.
This improves user experience and lowers the likelihood of server overloads that can trigger maintenance mode.
By optimizing your hosting environment with WordPress-specific support, managed hosting services, and server-side caching, you can significantly reduce the chances of encountering maintenance mode errors. These proactive measures enhance your site’s performance and ensure a smoother, more reliable user experience. Investing in a robust hosting solution is clever and pays dividends in site stability and user satisfaction.


 Lifetime VPS Europe
 Lifetime VPS Asia
 Lifetime Hosting
 France Lifetime Dedicated Servers
 Germany Lifetime dedicated servers
 Lifetime Game Dedicated Servers
 Chicago, US
 Singapore
 Hong Kong
 Seoul, South Korea
 Amsterdem, Netherlands
 London, UK
 Zurich, Switzerland
 Sydney, Australia
 DDOS Protection
 Submit Ticket
 Full Management
 Videos and Podcasts
 Voxfor Advanced Price Management For WooCommerce
 Voxfor AI Content Summary


