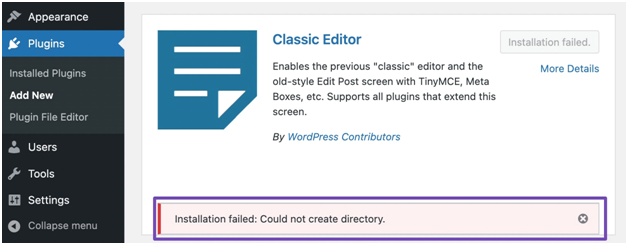
How to Fix Installation Failed Error in WordPress
How to fix Installation Failed: Could Not Create Directory, error while installing a plugin or theme on your WordPress site?
Understanding the Error:
Imagine trying to build a house without the necessary permissions or tools. Similarly, WordPress relies on specific file permissions and ownership settings to manage installations. This error arises when WordPress lacks the ability to create a directory (folder) needed for the plugin or theme, essentially halting the installation process.
Potential Culprits:
- Incorrect File Permissions: Think of file permissions as security levels dictating who can access, modify, or create files and directories. Incorrect permissions can act like locked doors, preventing WordPress from creating the necessary directory.
- Conflicting Ownership: Imagine someone else owning the house you’re trying to build – it creates ownership conflicts. Similarly, if the wrong user or group owns the relevant directory or parent directory, WordPress might not have the necessary privileges to create the new directory.
- Insufficient Disk Space: Just like a limited physical space hinders construction, insufficient disk space on your server can prevent WordPress from creating new directories.
- Outdated Files: Outdated WordPress core files, themes, or plugins can sometimes introduce compatibility issues, leading to installation failures.
- Corrupted Files: Damaged WordPress files or corrupted plugin/theme files can disrupt the installation process, triggering the error message.
Unlocking Solutions:
Now, let’s embark on a troubleshooting journey to identify and rectify the culprit:
- Verify File Permissions:
- Access your website files through an FTP client or your hosting panel’s file manager.
- Locate the directory where WordPress is installed (usually public_html or www).
- Check the permissions of the wp-content directory and its subdirectories (plugins, themes).
- Ensure they are set to 755 for directories and 644 for files.
- Use the “Change Permissions” option to adjust them if necessary.
- Resolve Ownership Conflicts:
- Access your website files via FTP or your hosting panel.
- Right-click on the wp-content directory and its subdirectories (plugins, themes).
- Select “Properties” or “File info” (depending on your FTP client or hosting panel).
- Check the “Owner” and “Group” fields.Ideally, they should be set to the user account your hosting provider uses for your website files.
- If different, consult your hosting provider to change ownership appropriately.
- Free Up Disk Space:
- Log in to your hosting control panel and check your disk space usage.
- If nearing capacity, consider deleting unnecessary files, optimizing your database, or upgrading your hosting plan.
- Ensure sufficient space is available for the installation to proceed.
- Update WordPress & Plugins/Themes:
- Navigate to the “Dashboard” in your WordPress admin panel.
- Click on “Updates” and ensure WordPress core, plugins, and themes are updated to the latest versions.
- Outdated versions can sometimes create compatibility issues, so updating might resolve the problem.
- Check for Corrupted Files:
- Download a fresh copy of the plugin or theme you’re trying to install.
- Delete the existing installation from your website files.
- Upload the fresh copy and attempt the installation again.
- Replace any potentially corrupted files with clean versions.
- Disable Security Plugins Temporarily:
- In rare cases, security plugins might interfere with installation processes due to overly restrictive settings.
- Temporarily deactivate any security plugins and attempt the installation again.
- Remember to re-activate them afterwards for optimal security.
- Seek Help from Your Hosting Provider:
- If the above solutions fail, consult your hosting provider’s support team.They have access to server-level logs and expertise that can help identify more complex issues related to file permissions, ownership, or server configurations.
Additional Tips:
- Always back up your site before making any changes.
- Test any changes on a staging site before implementing them on your live site.
- Keep your WordPress core, plugins, and themes updated for optimal security and compatibility.


