Lifetime VPS Europe
 Lifetime VPS Asia
 Lifetime Hosting
 France Lifetime Dedicated Servers
 Germany Lifetime dedicated servers
 Lifetime Game Dedicated Servers
 Chicago, US
 Singapore
 Hong Kong
 Seoul, South Korea
 Amsterdem, Netherlands
 London, UK
 Zurich, Switzerland
 Sydney, Australia
 DDOS Protection
 Submit Ticket
 Full Management
 Videos and Podcasts
 Voxfor Advanced Price Management For WooCommerce
 Voxfor AI Content Summary


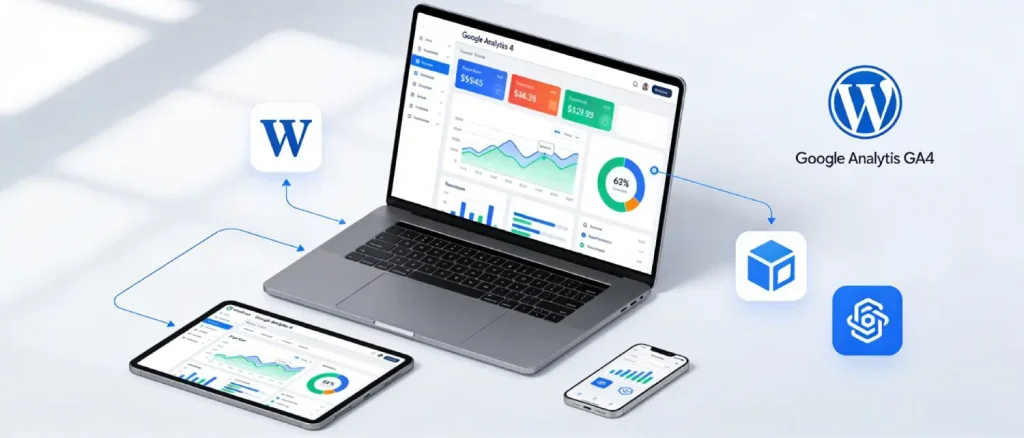
Data is the foundation of every successful WordPress website. If you don’t know who is visiting your website, where they live or what they do, you’re flying your digital marketing airplane without a compass. Google Analytics 4 (GA4) is the best free resource available to do this, and it’s easier to set up in WordPress than you might think.
Track traffic on websites backed by reliable VPS hosting
GA4 helps you understand visitors, but performance and uptime shape what visitors experience. Voxfor VPS gives website owners dedicated resources for analytics-ready sites, landing pages, and business growth.
GA4 is now the only option for website analytics, with Universal Analytics officially ending on July 1, 2023. GA4 introduces a new event-based approach to tracking users, replacing the traditional session-based approach, providing a more comprehensive and adaptable view of user interactions. This article covers all the basics, including how to set up a GA4 account, how to integrate it with your WordPress website, and some advanced tips for configuring GA4 that you might miss.
Why Google Analytics 4 Matters for WordPress Sites
The Case for Data-Driven Decision Making
In a data-centric digital landscape, any tool that gives you detailed insight into your website visitors is essential. GA4 provides a comprehensive view of user journeys, tracking how users arrive at your site via organic search, social media, direct visits, email campaigns, paid ads, and more. It tells you not just who is visiting, but what they do once they get there.
For WordPress site owners, GA4 answers critical business questions:
- Which channels reliably drive leads, conversions, or form submissions?
- How do visitors move through key pages before converting?
- What content attracts qualified traffic, not just raw pageviews?
- Where is the site leaking potential leads or revenue?
- Which campaigns deserve more budget, and which should be cut?
What GA4 Tracks on Your WordPress Site
GA4 captures a wide range of user behavior metrics directly on your WordPress website, including:
- Page views and session duration, how long users stay and which pages they visit
- Bounce rate, the percentage of single-page sessions that end without interaction
- Traffic sources, organic search, social media, referrals, direct, paid, and email
- User demographics, location, language, device type, browser, screen resolution
- Real-time activity, see live visitor data as it happens
- Conversion events, form submissions, purchases, button clicks, downloads
GA4 vs. Universal Analytics: Key Differences
GA4 is architecturally different from its predecessor in several important ways:
| Feature | Universal Analytics (Retired) | Google Analytics 4 |
| Data Model | Session-based | Event-based |
| Cross-Platform Tracking | Web only | Web + App unified |
| Cookie Dependence | Heavy | Reduced (privacy-first) |
| Machine Learning | Limited | Built-in AI/ML insights |
| Data Retention | Up to 26 months | Up to 14 months (default) |
| BigQuery Integration | Paid add-on | Free native integration |
| Reporting Interface | Standard reports | Explorations + custom reports |
GA4 event-driven model means that every user interaction, from a scroll to a video play to a form submission, is captured as a discrete event, giving you far more granular data than the old session-centric approach ever could.
Setting Up a Google Analytics 4 Account
Before adding GA4 to WordPress, a Google Analytics account and property must be created. The process takes only a few minutes.
Create a Google Analytics Account
- Go to analytics.google.com
- Sign in with your Google account (or create one if needed)
- Click “Start measuring.”
- Enter your Account Name (e.g., your website or company name)
- Configure Account Data Sharing settings and click Next
Create a GA4 Property
- Enter a Property Name for your website
- Choose your Reporting Time Zone and Currency
- Click Next and fill in your Business Details (industry, size, analytics goals)
- Click Create and accept Google’s Terms of Service Agreement
Set Up a Data Stream
- Under Data Streams, select Web as your platform
- Enter your Website URL and give your stream a name
- Click Create Stream
Once the stream is created, Google will display your Measurement ID (formatted as G-XXXXXXXXXX), this is the unique identifier you will add to your WordPress site. Save this ID, as every integration method requires it.
5 Methods to Add Google Analytics 4 to WordPress
There are multiple ways to connect GA4 to WordPress. The best method depends on your technical skill level, site complexity, performance requirements, and specific tracking needs.
Manual Code Integration (Via header.php)
The most direct and lightweight approach is adding the GA4 tracking script directly to your theme header.php file. This method is ideal for developers and advanced users who want zero plugin overhead.
Steps:
- In your WordPress Dashboard, go to Appearance → Theme File Editor (or Appearance → Editor in older versions)
- Select the header.php file
- Copy the GA4 Global Site Tag (gtag.js) from your Analytics account under Admin → Data Streams → Your Stream → View Tag Instructions
- Paste the code immediately before the closing
</head>tag - Click Update File to save
The tracking code looks like this:
<script async src="https://www.googletagmanager.com/gtag/js?id=G-XXXXXXXXXX"></script>
<script>
  window.dataLayer = window.dataLayer || [];
  function gtag(){dataLayer.push(arguments);}
  gtag('js', new Date());
  gtag('config', 'G-XXXXXXXXXX');
</script>
Important: Always use a child theme before modifying template files. If you update your parent theme, changes to header.php will be overwritten, losing your tracking code.
Alternatively, this same code can be added via your theme’s functions.php file using the wp_head action hook, a cleaner approach that survives theme updates when done in a child theme.
Pros: Lightweight, no plugin overhead, full control
Cons: Requires theme file editing, vulnerable to theme updates without a child theme
WPCode Plugin (Recommended for Non-Developers)
For users who want to add custom code without editing theme files directly, the WPCode (Insert Headers and Footers) plugin provides a safe, code-snippet manager for WordPress.
Steps:
- Install and activate WPCode from the WordPress plugin repository (Plugins → Add New → search “WPCode”)
- Go to Code Snippets → Headers & Footers in your dashboard
- Paste your GA4 tracking code in the Header field
- Click Save Changes
This method injects the code into the <head> section of every page without touching theme files, making it safe even through theme updates.
Using the MonsterInsights Plugin
MonsterInsights is the most popular Google Analytics plugin for WordPress, with over 3 million active installs and a 4.6/5 star rating. It offers one-click GA4 connection and displays analytics reports directly inside your WordPress dashboard, without needing to visit Google Analytics separately.
Steps:
- Go to Plugins → Add New in your WordPress dashboard
- Search for MonsterInsights, install and activate it
- Follow the setup wizard and click “Connect MonsterInsights & Setup Web Analytics.”
- Authenticate your Google account and select your GA4 property
- Click Complete Connection
Once connected, MonsterInsights pulls live tracking data and displays it inside your WordPress admin panel. The free version covers basic page views, sessions, and traffic sources. The Pro version ($99/year) unlocks eCommerce tracking, form analytics, custom dimensions, and more.
Best for: Beginners, content creators, and anyone who prefers seeing analytics data inside WordPress without navigating to a separate Google dashboard.
Using Site Kit by Google (Official Plugin)
Site Kit is Google’s own official WordPress plugin, combining GA4, Google Search Console, Google AdSense, and PageSpeed Insights in one unified dashboard.
Steps:
- Install Site Kit by Google from the plugin repository
- Follow the on-screen setup wizard to sign in and authenticate your Google account
- Select your GA4 property and data stream
- Grant the required permissions and complete the setup
Site Kit is completely free and requires no premium upgrade. Its main advantage is the consolidated view of Google services, you can see your analytics data, search performance, ad revenue, and page speed all in one place inside WordPress. It is particularly valuable for site owners who are already using Google Search Console and want a unified data view.
Best for: WordPress users who want a free, official Google-powered analytics solution with Search Console integration.
Using Google Tag Manager (GTM)
Google Tag Manager (GTM) is a tag management platform that lets you deploy and manage analytics scripts without touching your site’s code. While it adds a layer of setup complexity, GTM is the most powerful and scalable approach, particularly for sites that require custom event tracking, multiple marketing tags, or WooCommerce eCommerce tracking.
Steps:
- Create a GTM account at tagmanager.google.com and set up a Container for your website
- Install the GTM4WP (Google Tag Manager for WordPress) plugin
- Enter your GTM Container ID (formatted as GTM-XXXXXXX) in the plugin settings
- In GTM, create a new GA4 Configuration Tag, enter your Measurement ID, and set it to fire on All Pages
- Publish your GTM container
Once set up, all tracking tags, GA4, conversion pixels and remarketing codes are managed through GTM rather than through separate plugins or code edits.
Best for: Developers, marketers managing multiple tracking tags, WooCommerce stores needing advanced eCommerce event tracking, and sites requiring custom event configurations.
Choosing the Right Method
| Method | Technical Level | Plugin Required | Performance Impact | Best For |
| Manual (header.php) | Advanced | No | Minimal | Developers, performance-focused sites |
| WPCode Snippet | Beginner–Intermediate | Yes (lightweight) | Low | Non-devs who want no extra plugin data |
| MonsterInsights | Beginner | Yes | Moderate | Beginners, in-dashboard reporting |
| Site Kit by Google | Beginner | Yes | Moderate | Multi-Google-service integration |
| Google Tag Manager | Advanced | Yes (GTM4WP) | Low–Moderate | Developers, WooCommerce, complex tracking |
A critical caution: avoid installing GA4 through multiple methods simultaneously. Double-tracking is one of the most common GA4 mistakes on WordPress, it results in inflated pageview numbers, inaccurate bounce rates, and corrupted attribution data.
Advanced GA4 Features to Configure After Setup
Installing the tracking code is just the beginning. To unlock the real power of GA4, several advanced configurations are worth implementing.
Enhanced Measurement
GA4 Enhanced Measurement feature automatically tracks several key user interactions without any additional code:
- Scroll depth (when users reach 90% of a page)
- Outbound link clicks
- Site search queries
- Video engagement (play, progress, complete)
- File downloads (PDFs, documents, images)
- Form interactions
Enable Enhanced Measurement under Admin → Data Streams → Your Stream → Enhanced Measurement.
Custom Event Tracking
Beyond automated events, custom event tracking lets you capture specific user actions meaningful to your business, such as button clicks, newsletter signups, add-to-cart actions, or specific page interactions. Custom events can be configured via GTM (no code required in many cases) or by adding JavaScript event listeners to your theme.
GA4 Conversion Tracking
Conversions in GA4 are simply events that you mark as important. After setting up custom events (e.g., form_submit, purchase, lead_generated), mark them as Conversion Events under Admin → Events → Mark as Conversion. This unlocks conversion-based reporting and audience segmentation.
Cross-Domain Tracking
If your WordPress site operates across multiple domains, for example, a main website and a separate checkout domain, GA4 cross-domain tracking ensures user sessions are not fragmented across properties. Configure this under Admin → Data Streams → Configure Tag Settings → Configure Your Domains.
Audience Segmentation and Predictive Metrics
GA4 machine learning capabilities include predictive metrics that go beyond historical reporting:
- Purchase Probability: the likelihood a user will purchase within 7 days
- Churn Probability: the likelihood that an active user will stop engaging
- Predicted Revenue: estimated revenue from a group of users
These predictive audiences can be exported to Google Ads for targeted remarketing campaigns, making GA4 a powerful growth tool rather than just a reporting one.
BigQuery Integration
For high-traffic WordPress sites or data-intensive businesses, GA4 free native integration with Google BigQuery allows you to export raw event-level data for custom SQL queries, CRM data merging, and large-scale reporting far beyond what the standard GA4 interface offers.
WooCommerce and GA4: Enhanced eCommerce Tracking
For WordPress sites running WooCommerce stores, GA4 eCommerce tracking provides detailed insight into the full customer shopping journey:
- Product impressions and clicks
- Add-to-cart and remove-from-cart events
- Checkout funnel steps
- Purchase completions and revenue
- Cart abandonment analysis
Recommended Plugins for WooCommerce GA4
| Plugin | Key Features | Pricing |
| Conversios | GA4 + WooCommerce integration, server-side tracking, ad platform support | Freemium |
| GTM4WP | Full WooCommerce data layer, eCommerce events via GTM | Free |
| Enhanced Ecommerce Google Analytics for WooCommerce | Full customer journey tracking, dynamic remarketing and custom dimensions | Freemium |
| MonsterInsights Pro | In-dashboard eCommerce reports, automatic event tracking | $99/year |
To enable Enhanced eCommerce in GA4, go to Admin → Data Streams → Web → Enhanced Measurement and ensure relevant eCommerce events (view_item, add_to_cart, begin_checkout, purchase) are being tracked.
How GA4 Improves WordPress SEO and Content Strategy
GA4 is not just a traffic counter, it is a powerful SEO and content optimization tool.
Identifying Top-Performing Content: The Pages and Screens report shows which posts and pages drive the most engaged traffic. Pages with high engagement rates and low bounce rates signal content that resonates with your audience, perfect candidates for internal linking and update prioritization.
Diagnosing Content Gaps: Pages with high impressions (from Search Console integration) but low engagement suggest a keyword-content mismatch. GA4 data helps identify where visitors land but quickly leave, indicating content that needs to be improved or restructured.
Understanding Traffic Sources: GA4 acquisition reports break down organic search, social, direct, referral, and paid traffic separately. For WordPress content creators, understanding which distribution channels deliver high-quality engaged users (not just raw traffic) allows smarter content promotion decisions.
Mobile Optimization Insights: With mobile traffic accounting for the majority of web visits globally, GA4 device and platform reports reveal whether mobile users are having a worse experience than desktop users, a critical signal for theme selection and page speed optimization.
Verifying Your GA4 Installation
After completing the setup, always verify that tracking is working correctly before relying on the data.
Real-Time Report Test
- Open Google Analytics and navigate to Reports → Real-Time
- Open your WordPress website in a separate browser tab
- Navigate to several pages
- Return to GA4, active users should appear in the Real-Time Overview within seconds
Google Tag Assistant
Install the Google Tag Assistant Chrome extension to verify that the GA4 tag is firing correctly on each page. The extension shows all detected Google tags, their status, and any configuration errors.
DebugView
GA4’s built-in DebugView (under Admin → DebugView) provides a real-time stream of all events being sent from your site, allowing you to verify that custom events, conversions, and eCommerce events are configured correctly.
Troubleshooting Common GA4 Issues
Even after a correct installation, some tracking problems are common. The table below covers the most frequent issues and their solutions:
| Issue | Likely Cause | Solution |
| No data appearing | Tracking code missing or incorrect | Verify Measurement ID matches GA4 property; check via Tag Assistant |
| Real-time data not showing | Ad blockers or incorrect tag placement | Disable ad blocker for testing; confirm code is in <head>, not <body> |
| Inflated pageviews | Double-tracking (GA4 installed in multiple places) | Audit all plugins and code; remove duplicate implementations |
| Bounce rate is unusually high | Slow page load times or irrelevant content | Check Core Web Vitals; improve page speed; audit content relevance |
| Missing eCommerce data | Enhanced eCommerce is not configured | Enable Enhanced Measurement; verify WooCommerce events are firing |
| Conversion events are not tracking | Events not marked as conversions | Go to Admin → Events → Mark as Conversion for key events |
Data collection can take 24–48 hours to fully appear in standard GA4 reports after initial setup, real-time data appears immediately, while historical reports populate within two days.
Best Practices for Accurate GA4 Data on WordPress
Following these best practices ensures your analytics data reflects real user behavior rather than inflated or misleading numbers:
- Exclude internal traffic: Set up an IP filter under Admin → Data Filters to exclude your own team’s visits from reports
- Use a child theme: If adding code manually, always work in a child theme to prevent updates from wiping your tracking code
- Avoid multiple GA4 plugins: Installing more than one analytics plugin simultaneously causes double-counting
- Connect Google Search Console: Linking Search Console to GA4 unlocks keyword-level data and search performance reports in the same interface
- Set data retention to 14 months: By default, GA4 retains user data for only 2 months; change this under Admin → Data Settings → Data Retention
- Implement consent mode: For GDPR-compliant sites, use GA4’s Consent Mode to respect user cookie preferences while maintaining measurement accuracy
Conclusion
For website owners, bloggers, and marketers, the most valuable thing you can do for your site is to integrate Google Analytics 4 with WordPress. From a minimal manual code script to Google’s official Site Kit plugin, to the power of Google Tag Manager for advanced WooCommerce analytics, there’s a solution for every skill set and site category.
The trick is not to install GA4, but to set it up. Event Tracking, Conversions, eCommerce, and internal traffic filtering are the factors that make GA4 go from simply counting visitors to being used as a proactive strategy for optimising content, improving search engine optimisation (SEO) and boosting revenue. As GA4 becomes the new benchmark for analytics, the time spent on a good setup will flow through to all aspects of a WordPress website.
About the writer

Hassan Tahir wrote this article, drawing on his experience to clarify WordPress concepts and enhance developer understanding. Through his work, he aims to help both beginners and professionals refine their skills and tackle WordPress projects with greater confidence.