
If you’ve been searching for a CMS that gives you real, hands-on control over every part of your website, ExpressionEngine might just be the tool you’ve been waiting for. Unlike plug-and-play platforms, ExpressionEngine is a modular, flexible, feature-packed web publishing system that adapts to a broad range of needs, from personal blogs to large enterprise websites.
Inbound Marketing Strategy
Helpful tutorials attract qualified visitors, but reliable hosting keeps those readers engaged. Voxfor VPS gives growing websites the speed, uptime, and control needed to support stronger inbound marketing campaigns.
Developed originally by EllisLab in the early 2000 and later acquired by Packet Tide, ExpressionEngine has carved out its place as the go-to CMS for developers who demand precision. It separates your content, design, and data storage into independent layers, giving you full control over how every page looks and behaves. That level of structure is exactly what agencies and professional web developers love about it.
Understanding how ExpressionEngine handles content is key before you dive into the installation. Unlike traditional CMS platforms that tie your content directly to page templates, ExpressionEngine stores your content inside Channels, think of as independent data containers.
A Channel is simply a container that holds information. This might be the text of an article, a blog post, an image, or any other type of data. Crucially, this channel information exists completely independently from the pages your visitors actually see. That means there is no assumed relationship between where your content lives and how it gets displayed.
The display side is handled entirely by Templates, which contain any markup you desire, HTML, JavaScript, CSS, and ExpressionEngine Tags that pull content dynamically from your channels. ExpressionEngine gives you 100% control over the markup on every page, which is what makes it a true content management system rather than just a page builder. When a visitor loads a page, ExpressionEngine dynamically generates the page by combining channel data with your template markup, ensuring consistent display across all devices.
Before jumping into the installation, it’s worth asking why someone would choose ExpressionEngine over other options. Here’s what makes it stand out:
Full markup control: You write 100% of the HTML, CSS, and JavaScript, with no theme overrides or forced layout restrictions
ExpressionEngine is especially powerful for complex enterprise projects where development expertise is available, and granular content control is a priority.
Before you install ExpressionEngine, make sure your server and browser meet the requirements. Running the CMS on an unsupported environment can lead to performance issues or security vulnerabilities.
| Requirement | Minimum | Recommended |
| PHP Version | PHP 5.6.0+ | PHP 7.2 or higher |
| MySQL Version | MySQL 5.5.3+ | MySQL 5.6 or newer |
| Server Memory | 32MB | 64MB+ |
| Web Server | Apache or Nginx | Apache with AcceptPathInfo enabled |
It’s strongly advisable to use PHP 7.2 or higher, since older versions may not be actively supported and can pose security risks. Running older versions also hurts performance, increasing the overall cost of maintaining your website.
The following PHP extensions must be enabled on your server:
Note: JavaScript must be enabled in your browser to use the control panel.
If you’re running Apache, ensure that AcceptPathInfo is enabled for URLs to work properly. You should also set your site’s URLs to use query strings for maximum compatibility.
Now that your environment is ready, let’s walk through the complete installation process. Take your time with each step; getting the foundation right makes everything else smoother.
Head over to the official ExpressionEngine website at expressionengine.com and download the latest release. Click the “Get Started” button and enter your email address. The download will begin as a ZIP file. Once downloaded, rename the ZIP file to “ExpressionEngine” to keep things organized.
Always download the latest stable version. Older versions not only miss new features but can also expose your site to known security vulnerabilities.
Before uploading any files, you need to create an empty MySQL database. Have the following credentials ready, you’ll need them during the installation wizard:
If you’re unsure how to create a database, your hosting control panel (like cPanel) typically includes a MySQL Database Wizard. You can also ask your web host for assistance.
Using an FTP client such as FileZilla, connect to your server using your hosting credentials. Once connected, navigate to your application’s public_html folder and upload the downloaded ExpressionEngine ZIP file.
After uploading, connect to your server via SSH terminal and unzip the archive using the following command:
unzip -r expressionengineThis will extract all EE files into your application folder within a few moments.
Alternatively, most modern hosting control panels (like cPanel) allow you to upload and extract ZIP files directly through their file manager, no FTP client needed.
This is a step many beginners overlook, but it’s critical. ExpressionEngine needs write access to specific files and folders to function correctly.
For Apache servers, set the following permissions:
The following paths require write access:
system/ee/
system/ee/* (top-level files and directories only)
system/user/config/config.php
system/user/cache/
system/user/templates/
images/avatars/
images/captchas/
images/member_photos/
images/pm_attachments/
images/signature_attachments/
images/uploads/
themes/ee/
themes/user/
On Unix-based systems, you can set permissions recursively via the terminal. Check with your web host to see if more restrictive permissions can be used while still allowing PHP to write to files and directories.
For IIS servers, provide full permissions to the IIS user for the listed files and directories.
With files uploaded and permissions set, it’s time to launch the installation wizard. Open your web browser and navigate to your domain, followed by /admin.php. For example:
This opens the ExpressionEngine Installation and Update Wizard. Click “Click here to begin!” and the wizard will run pre-installation tests to confirm your server environment is ready.
The installation wizard will prompt you to enter your database credentials:
127.0.0.1Double-check each field carefully. An incorrect entry here is the most common cause of installation failure.
Next, you’ll be asked to create your ExpressionEngine administrator account. Enter:
At this point, you will also be asked to install a default theme. In case you are new to ExpressionEngine, the default theme will provide you with a running template framework to experiment on before you create one. After that, go to the start of installation.
After the installation completes successfully, your website’s homepage will load. To access the admin control panel, navigate to:
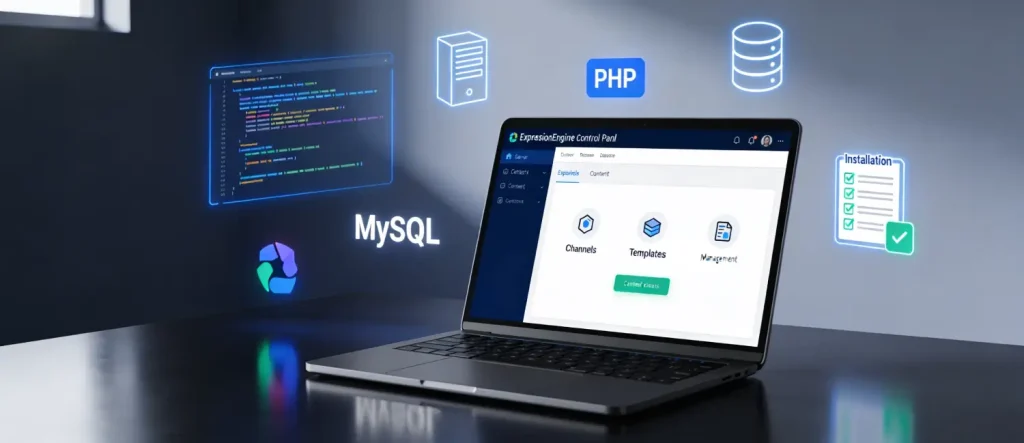
https://yourdomain.com/admin.phpType in the username and password that you made in Step 7. You will be greeted with the ExpressionEngine Control Panel dashboard, which is where you will control all your content, templates, channels, members and settings.
Once you’re inside, take a moment to get familiar with the layout. The ExpressionEngine control panel is cleanly designed and adapts to any screen size, whether you’re working on a desktop, tablet, or mobile device.
The Jump Menu (CMD/CTRL + J) is a handy productivity feature that lets you navigate the control panel quickly by typing the name of any section. This is particularly useful as your site grows and you find yourself switching between channels, templates, and settings frequently.
ExpressionEngine comes loaded with features that make it worth the setup effort. Here’s what to dig into right after installation:
ExpressionEngine has a large selection of types of fields to make sure that your content can be stored in the most appropriate manner based on the type of data. Require a staff page of employee biographies? Build a channel named Staff with the custom fields of name, bio, photo, and role. Need a product catalog? Create a Products channel that contains a price, description and image fields. The flexibility is genuinely impressive.
The template engine has sub-templates, conditional operators, dynamic variables, embedded PHP and direct SQL queries. You are also able to embed one template into another through the Embed Tag which is great to use when you need to use the same template in your entire site and you do not need to copy the code.
Virtually all systems in ExpressionEngine are handled as add-on modules, making it extensible for almost any purpose. Installing an add-on is straightforward:
system/user/addons/You can browse available add-ons at the official ExpressionEngine Add-on Store at expressionengine.com/add-ons.
ExpressionEngine also has a powerful membership solution that will allow you to create members, assign roles and define who can create and edit content. It works best with community websites or news rooms or any other project where there are multiple contributors.
ExpressionEngine includes built-in SEO management tools, including customizable URL structures, meta fields, and full control over page markup. Since you control 100% of the HTML output, you can fine-tune every SEO element, from structured data to canonical tags, without fighting a theme or plugin layer.
Scheduling content for future publication is built right in. Plan your editorial calendar and let ExpressionEngine handle the rest automatically.
Keeping ExpressionEngine updated is important for security and performance. If a newer version is available, you’ll see a notification in the control panel footer, highlighted in yellow or red. Simply click on the version number and follow the on-screen prompts to update.
Always install the latest version when setting up a new site. For existing installations, check the control panel footer regularly to stay on top of available updates.
If you’ve enabled an SSL certificate, here’s how to force HTTPS site-wide in three quick steps:
Step 1: Open your .htaccess file and add the following redirect rules:
# Force HTTPS
RewriteCond %{HTTPS} off
RewriteRule (.*) https://%{HTTP_HOST}%{REQUEST_URI} [L]
Step 2: Convert any Google Fonts links to use protocol-relative URLs (starting with // instead of http://).
Step 3: Add the following code to your index.php file to set the site URL to be HTTPS-compatible:
if(strtolower(substr($_SERVER["SERVER_PROTOCOL"],0,5))=='https') {
    $assign_to_config['site_url'] = 'https://'.$_SERVER['HTTP_HOST'].'/';
}ExpressionEngine is a little harder to install initially than drag-and-drop website builders, but the amount of control and flexibility you have in ExpressionEngine is more than worth it. Bringing together a freestyle collection of employees to create an intricate news site, a multi-user publishing system, or a highly tailored business site ExpressionEngine has the tools needed to get it right, in your own way.
Start by getting your server environment right, follow the installation steps carefully, and spend time exploring the Channels and Templates system. Once it clicks, you’ll understand why developers and agencies have trusted ExpressionEngine for over two decades.

Hassan Tahir wrote this article, drawing on his experience to clarify WordPress concepts and enhance developer understanding. Through his work, he aims to help both beginners and professionals refine their skills and tackle WordPress projects with greater confidence.


 Lifetime Hosting
 France Lifetime Dedicated Servers
 Germany Lifetime dedicated servers
 Lifetime Game Dedicated Servers
 Chicago, US
 Singapore
 Hong Kong
 Seoul, South Korea
 Amsterdem, Netherlands
 London, UK
 Zurich, Switzerland
 Sydney, Australia
 DDOS Protection
 Submit Ticket
 Full Management
 Videos and Podcasts
 Voxfor Advanced Price Management For WooCommerce
 Voxfor AI Content Summary


