
Google Analytics can easily qualify as one of the most potent tools to know how your site performs and how people use it. Regardless of whether you are operating a custom PHP application, dynamic site or a server-side rendered application, it is necessary to incorporate Google Analytics to track important insights. This tutorial will show you several ways to integrate Google Analytics to your PHP application, including simple integration and complex server event tracking.
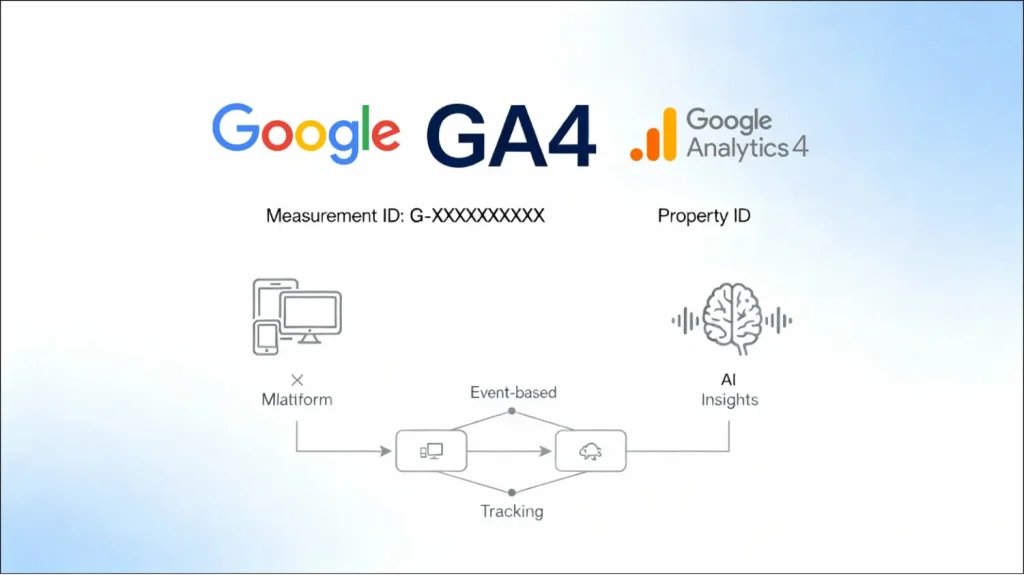
Google Analytics 4 has changed significant from Universal Analytics. Unlike its predecessor, GA4 uses an event-based tracking model rather than session-based tracking, providing more granular insights into user interactions. GA4 offers enhanced cross-platform tracking, AI-powered insights, and improved privacy compliance features.
The measurement system in GA4 revolves around two key identifiers that you need to understand:
Measurement ID – A unique identifier for your GA4 property, formatted as G-XXXXXXXXXX. This ID tells Google Analytics which property should receive your tracking data. Each web data stream within a GA4 property has its own measurement ID.
Property ID – A distinct identifier for your entire GA4 property, which can contain multiple data streams (web, iOS app, Android app, etc.). All data streams within the same property share the same property ID, but each has a unique measurement ID.

Before implementing any tracking code, you need to create a Google Analytics 4 account and property.
After creating your property, you’ll be prompted to create a data stream. Follow these steps:
After creating your data stream:
To find your Measurement ID anytime:
The most straightforward method is to add GA tracking code to your website header file. This approach works for both custom PHP applications and standard PHP websites.
If your PHP website has a central header file that loads on every page, add the GA4 tracking code there.
<!-- Google tag (gtag.js) -->

<script async src="https://www.googletagmanager.com/gtag/js?id=G-XXXXXXXXXX"></script>

<script>

  window.dataLayer = window.dataLayer || [];

  function gtag(){dataLayer.push(arguments);}

  gtag('js', new Date());

  gtag('config', 'G-XXXXXXXXXX', { 'send_page_view': true });

</script>For better organization and maintainability, create a dedicated analytics file:
<!-- Google tag (gtag.js) -->

<script async src="https://www.googletagmanager.com/gtag/js?id=G-XXXXXXXXXX"></script>

<script>

  window.dataLayer = window.dataLayer || [];

  function gtag(){dataLayer.push(arguments);}

  gtag('js', new Date());

  gtag('config', 'G-XXXXXXXXXX', { 'send_page_view': true });

</script><?php include_once 'ga-tracking.php'; ?>This approach keeps your analytics code separate from your main header template, making it easier to manage and update.
For maximum flexibility, use a PHP function that conditionally loads the tracking code:
<?php

function load_google_analytics() {

    ?>

    <!-- Google tag (gtag.js) -->

    <script async src="https://www.googletagmanager.com/gtag/js?id=G-XXXXXXXXXX"></script>

    <script>

      window.dataLayer = window.dataLayer || [];

      function gtag(){dataLayer.push(arguments);}

      gtag('js', new Date());

      gtag('config', 'G-XXXXXXXXXX', { 'send_page_view': true });

    </script>

    <?php

}

// Add the function to the wp_head hook if using WordPress

add_action('wp_head', 'load_google_analytics');

// Or call it directly in your header.php

// load_google_analytics();

?>
This method is especially useful if you want to conditionally load analytics (e.g., only in production, not in development environments) or add additional business logic.
Google Tag Manager is a central hub for managing all your tracking tags without needing to modify your website code repeatedly.
Google Tag Manager provides two code snippets:
First snippet – Add this in the <head> section:
<!-- Google Tag Manager -->

<script>(function(w,d,s,l,i){w[l]=w[l]||[];w[l].push({'gtm.start':

new Date().getTime(),event:'gtm.js'});var f=d.getElementsByTagName(s),

j=d.createElement(s),dl=l!='dataLayer'?'&l='+l:'';j.async=true;j.src=

'https://www.googletagmanager.com/gtm.js?id='+i+dl;f.parentNode.insertBefore(j,f);

})(window,document,'script','dataLayer','GTM-XXXXXXX');</script>

<!-- End Google Tag Manager -->

Second snippet – Add this immediately after the opening <body> tag:

xml

<!-- Google Tag Manager (noscript) -->

<noscript><iframe src="https://www.googletagmanager.com/ns.html?id=GTM-XXXXXXX"

height="0" width="0" style="display:none;visibility:hidden"></iframe></noscript>

<!-- End Google Tag Manager -->For a custom PHP website, create a file called gtm-header.php:
<?php

// Include this file in your header before any other scripts

$gtm_id = 'GTM-XXXXXXX';

?>

<!-- Google Tag Manager -->

<script>(function(w,d,s,l,i){w[l]=w[l]||[];w[l].push({'gtm.start':

new Date().getTime(),event:'gtm.js'});var f=d.getElementsByTagName(s),

j=d.createElement(s),dl=l!='dataLayer'?'&l='+l:'';j.async=true;j.src=

'https://www.googletagmanager.com/gtm.js?id='+i+dl;f.parentNode.insertBefore(j,f);

})(window,document,'script','dataLayer','<?php echo $gtm_id; ?>');</script>

<!-- End Google Tag Manager -->
And a file called gtm-body.php for the body tag:
<?php

$gtm_id = 'GTM-XXXXXXX';

?>

<!-- Google Tag Manager (noscript) -->

<noscript><iframe src="https://www.googletagmanager.com/ns.html?id=<?php echo $gtm_id; ?>"

height="0" width="0" style="display:none;visibility:hidden"></iframe></noscript>

<!-- End Google Tag Manager -->
Then include these files in your header and body:
<?php include 'gtm-header.php'; ?>

</head>

<body>

<?php include 'gtm-body.php'; ?>While the above methods track client-side interactions (page views, clicks), sometimes you need to track server-side events like form submissions, purchases, or authentication attempts.
GA4 provides a Measurement Protocol API that allows you to send events from your server directly to Google Analytics. This is valuable when you want to track events that happen on the backend.
Here’s a PHP class to send events to GA4:
<?php
class GA4Events {
    private $measurement_id;
    private $api_secret;
    private $client_id;

    public function __construct($measurement_id, $api_secret, $client_id) {
        $this->measurement_id = $measurement_id;
        $this->api_secret = $api_secret;
        $this->client_id = $client_id;
    }

    /**
     * Send a custom event to Google Analytics 4
     *
     * @param string $event_name Name of the event (e.g., 'purchase', 'form_submit')
     * @param array $event_params Event parameters (optional)
     * @return bool Success status
     */
    public function send_event($event_name, $event_params = []) {
        $url = "https://www.google-analytics.com/mp/collect?api_secret={$this->api_secret}&measurement_id={$this->measurement_id}";

        // Build the event payload
        $payload = [
            'client_id' => $this->client_id,
            'events' => [
                [
                    'name' => $event_name,
                    'params' => $event_params
                ]
            ]
        ];

        // Initialize cURL
        $ch = curl_init($url);
        curl_setopt_array($ch, [
            CURLOPT_CUSTOMREQUEST => 'POST',
            CURLOPT_POSTFIELDS => json_encode($payload),
            CURLOPT_HTTPHEADER => ['Content-Type: application/json'],
            CURLOPT_RETURNTRANSFER => true,
            CURLOPT_SSL_VERIFYPEER => true
        ]);

        // Send the request
        $response = curl_exec($ch);
        $http_status = curl_getinfo($ch, CURLINFO_HTTP_CODE);
        curl_close($ch);

        // Return success if status is 204 (No Content) or 200 (OK)
        return in_array($http_status, [200, 204]);
    }
}
?>
<?php
// Initialize the GA4 event tracker
$ga4_events = new GA4Events(
    'G-XXXXXXXXXX',          // Your Measurement ID
    'your_api_secret_here',  // Your API Secret
    'client_id_value'        // Client ID (can be session ID or unique visitor ID)
);

// Example: Track a contact form submission
if ($_SERVER['REQUEST_METHOD'] === 'POST' && isset($_POST['contact_form'])) {
    // Process the form
    $name = sanitize_input($_POST['name']);
    $email = sanitize_input($_POST['email']);
    $message = sanitize_input($_POST['message']);

    // Validate and save the form data
    if (validate_email($email) && !empty($message)) {
        // Save to database or send email
        save_contact_message($name, $email, $message);

        // Send event to Google Analytics
        $ga4_events->send_event('contact_form_submission', [
            'user_name' => $name,
            'email' => $email,
            'message_length' => strlen($message),
            'form_location' => 'contact_page'
        ]);

        $success_message = "Thank you for your message!";
    }
}
?>
<?php
if ($_SERVER['REQUEST_METHOD'] === 'POST' && isset($_POST['register'])) {
    $username = sanitize_input($_POST['username']);
    $email = sanitize_input($_POST['email']);
    $password = $_POST['password'];

    // Validate and create user
    if (validate_registration_form($username, $email, $password)) {
        $user_id = create_user_account($username, $email, $password);

        // Track the sign_up event in GA4
        $ga4_events->send_event('sign_up', [
            'method' => 'email',
            'user_id' => $user_id,
            'username' => $username
        ]);

        // Redirect to confirmation page
        header('Location: /registration-confirmed');
    }
}
?>For e-commerce sites, tracking purchases is critical:
<?php
if ($transaction_complete) {
    $total_value = 0;
    $items = [];

    foreach ($cart_items as $item) {
        $total_value += $item['price'] * $item['quantity'];
        $items[] = [
            'item_id' => $item['product_id'],
            'item_name' => $item['product_name'],
            'affiliation' => 'Your Store Name',
            'coupon' => isset($item['coupon']) ? $item['coupon'] : '',
            'currency' => 'USD',
            'discount' => $item['discount'] ?? 0,
            'index' => count($items),
            'item_brand' => $item['brand'],
            'item_category' => $item['category'],
            'item_category2' => $item['subcategory'] ?? '',
            'item_list_id' => 'cart_list',
            'item_list_name' => 'Shopping Cart',
            'item_variant' => $item['variant'] ?? '',
            'price' => $item['price'],
            'quantity' => $item['quantity']
        ];
    }

    // Send purchase event to GA4
    $ga4_events->send_event('purchase', [
        'transaction_id' => $order_id,
        'affiliation' => 'Your Store Name',
        'value' => $total_value,
        'currency' => 'USD',
        'tax' => calculate_tax($total_value),
        'shipping' => $shipping_cost,
        'coupon' => $coupon_code ?? '',
        'items' => $items
    ]);
}
?>If you’re using WordPress, installing a Google Analytics plugin is the easiest approach:
Popular WordPress analytics plugins include:
For custom PHP applications, you can use third-party libraries:
Using Composer:
composer require google/analytics-phpExample Implementation:
<?php
require 'vendor/autoload.php';

use Google\Analytics\MeasurementProtocol\Event;
use Google\Analytics\MeasurementProtocol\Client;

$client = new Client([
    'measurement_id' => 'G-XXXXXXXXXX',
    'api_secret' => 'your_api_secret'
]);

$event = new Event('purchase', [
    'transaction_id' => 'T_12345',
    'value' => 99.99,
    'currency' => 'USD'
]);

$client->send($event);
?>
After implementing the tracking code:
Browser extension:
For custom events, use the DebugView feature:
Use a Child Theme or Separate File – Never edit parent theme files directly if using WordPress. Use child themes or hooks to add tracking code.
Always Use HTTPS – Google Analytics requires a secure connection. Ensure your website uses HTTPS before implementing tracking.
Respect User Privacy – Implement cookie consent notices and respect user preferences. GA4 automatically anonymizes IP addresses, but follows GDPR and local privacy regulations.
Test Before Production – Test all tracking implementation in a staging environment before deploying to production.
Document Your Events – Create a tracking plan document that lists all custom events, their parameters, and their purpose.
Keep Your Code Updated – Google occasionally updates the tracking code format. Check periodically for updates and apply them.
Monitor Data Quality – Regularly review your analytics data for anomalies. Verify that page view counts match actual traffic.
Use Meaningful Event Names – Follow Google naming conventions (lowercase with underscores, e.g., contact_form_submit not ContactFormSubmit).
Issue: You’ve added the tracking code, but no data appears after 24-48 hours.
Solutions:
Issue: Custom events you’re sending via PHP aren’t appearing in GA4.
Solutions:
Issue: Multiple tracking codes are causing data duplication or errors.
Solutions:
Adding Google Analytics to your PHP website is straightforward, whether you choose a simple implementation or a more sophisticated approach with custom server-side event tracking. The method you select depends on your website’s complexity, your specific tracking needs, and your technical expertise.
For most PHP websites, adding the GA4 tracking code to your header file is sufficient for understanding basic user behavior, traffic sources, and page performance. For advanced use cases like e-commerce tracking, form submissions, or user authentication events, implementing server-side event tracking via the Measurement Protocol provides greater accuracy and reliability.

Hassan Tahir wrote this article, drawing on his experience to clarify WordPress concepts and enhance developer understanding. Through his work, he aims to help both beginners and professionals refine their skills and tackle WordPress projects with greater confidence.


 Lifetime Hosting
 France Lifetime Dedicated Servers
 Germany Lifetime dedicated servers
 Lifetime Game Dedicated Servers
 Chicago, US
 Singapore
 Hong Kong
 Seoul, South Korea
 Amsterdem, Netherlands
 London, UK
 Zurich, Switzerland
 Sydney, Australia
 DDOS Protection
 Submit Ticket
 Full Management
 Videos and Podcasts
 Voxfor Advanced Price Management For WooCommerce
 Voxfor AI Content Summary


