
PIP is a tool for managing the Python packages. It helps you install and manage libraries not included in the Python standard library. It simplifies working with Python by making installing and managing external modules easier. This guide will walk you through how to install PIP on Windows.
Python development hosting
Pip helps manage Python packages locally, while Voxfor VPS gives you a place to run, test, and host Python applications with dedicated resources.

PIP stands for “Pip Installs Packages.” This tool helps you install and manage Python software packages hosted on the Python Package Index (PyPI).
Before installing PIP, you need to have Python installed on your computer. To check if Python is installed:

Type the following command and press Enter:
python --version
2. If Python is installed, the version number will appear. You can also download and install Python from the official Python website.

Install PIP is often included with newer Python versions. To check if it’s already installed:
Type the following command:
pip --version
2. If you see a version number, PIP is installed. If you get an error saying pip is not recognized, proceed to the installation steps below.
If PIP is not installed, download the installation script:
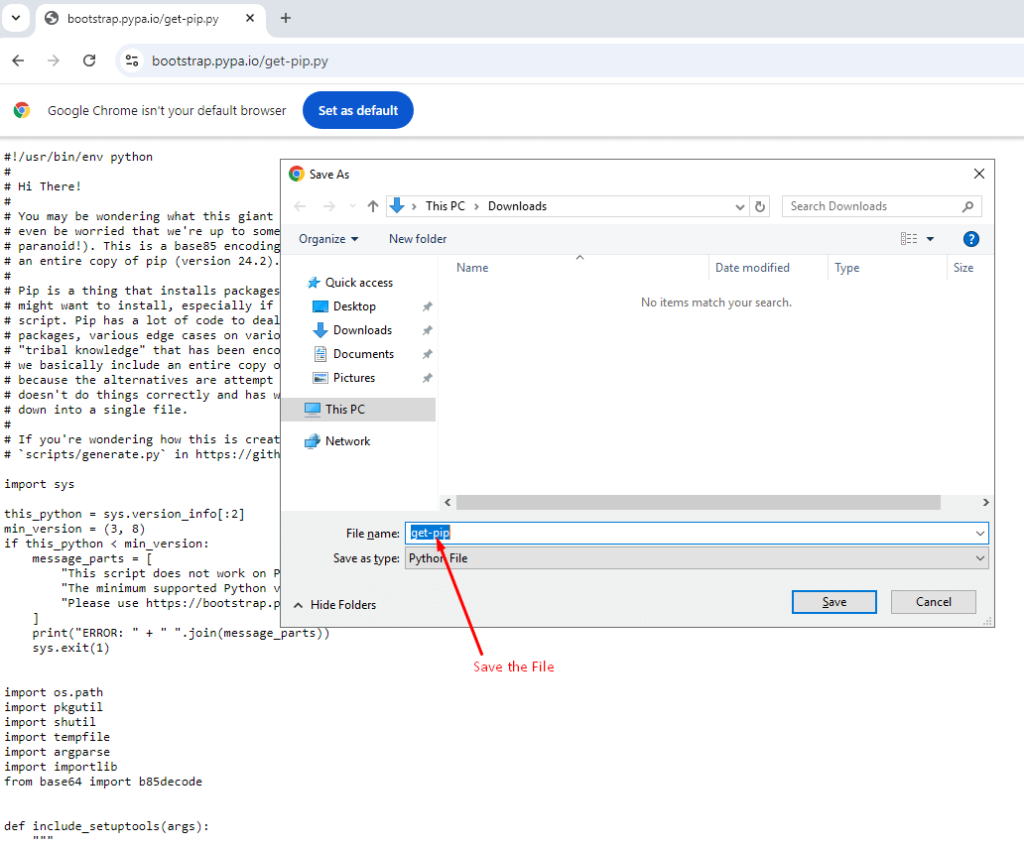
Once you have the get-pip.py file:
Open Command Prompt and open the folder where you saved get-pip.py. For example:
cd C:\Users\YourUsername\Downloads
Run the script using the following command:
python get-pip.py
PIP will be installed. After the installation finishes, confirm it by typing:
pip --versionIf you see a version number, PIP has been successfully installed.

If you encounter an error indicating that a command is unrecognized, it may require being added to the system’s PATH environment variable.
Click New and add the path where PIP is installed. It’s usually something like:
C:\Users\YourUsername\AppData\Local\Programs\Python\PythonXX\Scripts\To ensure everything is set up correctly, open Command Prompt and type:
pip --versionYou should see the PIP version number, confirming that it’s ready to use.

Now PIP is installed, you can use it to install Python packages; install the popular requests package by the following command:
pip install requestsIt will retrieve and install the specified package with any necessary dependencies.

Here are some common commands you can use with PIP:
Install a package:
pip install package_name
Upgrade a package:
pip install --upgrade package_name
Uninstall a package:
pip uninstall package_nameList installed packages:
pip list
Show details about a package:
pip show package_nameTo further improve the guide on installing PIP, adding advanced troubleshooting tips would provide users with solutions to common issues they may face during installation. These tips help beginners and advanced users resolve errors quickly and efficiently.
A common problem is encountering the error message: “PIP is not recognized as a command.” , even after installation. Such issues typically occur when the Python and PIP paths are not included in the system’s environment variables. A troubleshooting section could include detailed steps for checking and manually adding the correct paths to the system’s PATH variable.
Another frequent issue is SSL certificate errors while installing packages. In restrictive network environments, users may encounter errors like “SSL certificate verification failed.” A helpful tip would be to guide users using the –trusted-host flag to temporarily bypass SSL verification and successfully install the required packages.
Example:
pip install package_name --trusted-host pypi.org
If multiple versions of Python are installed on a system, PIP might need to be fixed. In such cases, users should be guided on managing multiple installations using tools like the py launcher or by specifying the full path to the Python and PIP executables to avoid conflicts.
Installing PIP on Windows is simple and allows you to manage Python libraries easily. By following this guide, you should now have PIP installed on your Windows system and be able to use it to install Python packages.
If you encounter any issues, double-verify the steps or consult the official PIP documentation for more help.

Vinayak Baranwal wrote this article. Use the provided link to connect with Vinayak on LinkedIn for more insightful content or collaboration opportunities.


 Lifetime VPS Europe
 Lifetime VPS Asia
 Lifetime Hosting
 France Lifetime Dedicated Servers
 Germany Lifetime dedicated servers
 Lifetime Game Dedicated Servers
 Chicago, US
 Singapore
 Hong Kong
 Seoul, South Korea
 Amsterdem, Netherlands
 London, UK
 Zurich, Switzerland
 Sydney, Australia
 DDOS Protection
 Submit Ticket
 Full Management
 Videos and Podcasts
 Voxfor Advanced Price Management For WooCommerce
 Voxfor AI Content Summary


