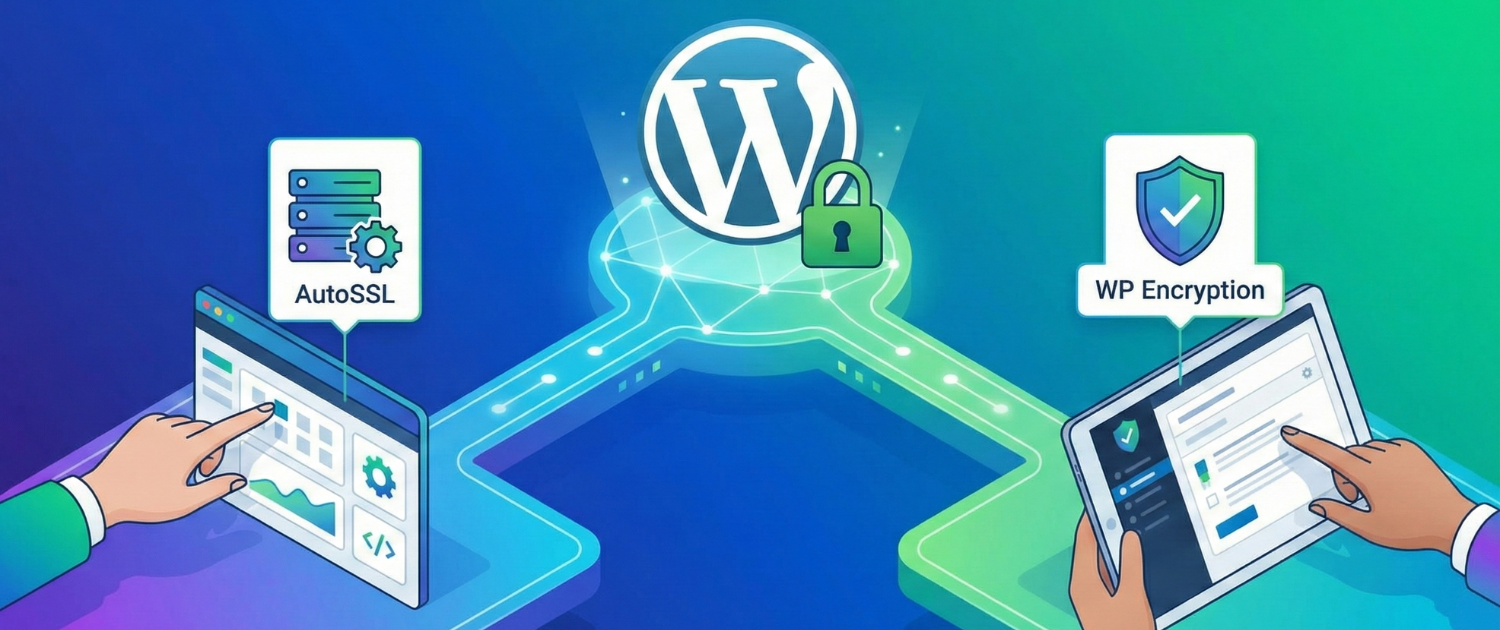
The World Wide Web structure has been radically transformed in the past decade and is now in a state of compulsory encryption as opposed to default openness. HTTP has been significantly replaced by its secure version, HTTPS, which was originally the standard bearer of digital information. To administrators of WordPress ecosystems, which serve a major numerical majority of the visible web, this change is not a compliance checkbox but a principle of data integrity, user trust and search visibility.
The cryptographic protocol that provides such transition is the execution of the Secure Socket Layer (SSL) and more recent successor Transport Layer Security (TLS). Although the technical basis of Public Key Infrastructure (PKI) is complicated, the WordPress application layer has been developed to hide these complicated elements by implementing advanced plugins and automated certificate handling environments. The present-day report presents a comprehensive, knowledgeable, analytical discussion of the approaches to obtaining, installing, and maintaining free SSL in the WordPress setting. It functions as a thorough guide to administrators of any skill level, combining the theoretical imperatives of encryption with the actualities of the deployment of a particular method, namely, a particular type of encrypted content that is deployed via a specific set of plugins.

In order to effectively deal with the Cryptographic protocols that the plugins manage, one should have subtle knowledge of the protocols being dealt with by the SSL plugins. Although still informally used, the standard that is used today is Transport Layer Security (TLS), and TLS 1.2 and 1.3 are commonly the current state of the art of security.
The safe linkage created by a WordPress site employs a hybrid encryption model that takes advantage of the benefits of both asymmetric and symmetric encryption.
Asymmetric Key Exchange
The initial phase of the connection, known as the handshake, employs asymmetric cryptography. The server presents a Public Key, encoded within the SSL certificate, to the connecting client. The client uses this key to encrypt a session-specific pre-master secret. This encrypted secret can only be decrypted by the server, which possesses the mathematically related Private Key. This mechanism allows two parties who have never met to establish a shared secret over an insecure channel without fear of interception.1
Symmetric Session Encryption
Once the shared secret is established, the protocol switches to symmetric encryption (typically AES) for the actual transmission of data. Symmetric encryption is computationally efficient, allowing for the rapid encryption and decryption of the heavy payloads associated with modern web content, images, scripts, and HTML, without introducing significant latency to the user experience.
The security of this system depends on Certificate Authorities (CA). CA is an authority that ensures the authenticity of the owner of the domain and then issues a digital certificate. The browser will believe the certificate not because it recognizes the site, but because it believes the CA which signed the certificate. This Chain of Trust runs on a Root CA (the keys of which are pre-built into the operating system or browser) via Intermediate CAs to the Leaf Certificate on the WordPress server.
The security of this system depends on Certificate Authorities (CA). CA is an authority that ensures the authenticity of the owner of the domain and then issues a digital certificate. The browser will believe the certificate not because it recognizes the site, but because it believes the CA which signed the certificate. This Chain of Trust runs on a Root CA (the keys of which are pre-built into the operating system or browser) via Intermediate CAs to the Leaf Certificate on the WordPress server.
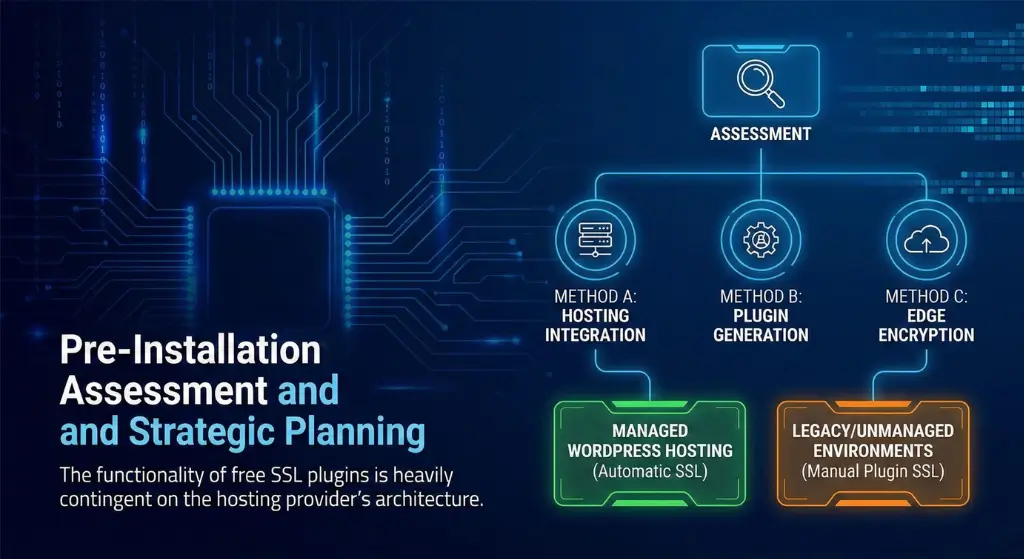
The first action to be taken prior to the installation of any type of plugin is to audit the current hosting environment. The implementation strategy (Method A), Hosting Integration, (Method B) Plugin Generation, or (Method C) Edge Encryption, is completely dependent on the ability of the underlying infrastructure.
The functionality of free SSL plugins is heavily contingent on the hosting provider’s architecture.
Managed WordPress Hosting
Platform-level providers like Voxfor usually handle the encryption of the SPL. The certificate in these situations can be automatically installed when the domain is propagated. The role of an SSL plugin here is limited to “forcing” HTTPS redirects and fixing mixed content errors, rather than generating the certificate itself.
Legacy or Unmanaged Environments
In situations where the host does neither accommodate AutoSSL nor does the installation of certificates require a paid add-on, the administrator of WordPress would have to take over the role of the certificate manager. This is where the use of plugins such as WP Encryption or SSL Zen comes in, as it fills the gap between the WordPress application layer and the cryptographic settings of the server.
Switching between HTTP and HTTPS requires a change of the main URL structure of the site and the configuration files of the server (.htaccess). These are changes of high impact. There is the possibility of a misconfiguration that may lead to a loop with too many redirects or lock the administrator out of the dashboard. Hence, it is a compulsory requirement to be in possession of a full-scale copy of the WordPress database and the wp-content folder. This is so that, should there be any failure in the implementation of the SSL, the site remains recreatable to the state before encryption without any loss of data.
The best way to use WordPress to establish a strong methodology is by using the tools that the hosting infrastructure offers. This is to ensure that the certificate lifecycle is not tied to WordPress installation and, therefore, it will be recycled even when the WordPress application fails.
For the vast majority of beginners using shared hosting, the certificate is likely already available but dormant.
SiteGround and Bluehost Specifics
In websites such as SiteGround, the administrator will go to the Site Tools or cPanel and to the Security Manager. In this case, one can utilize the option of issuing a one-click standard or a wildcard certificate through the use of the “Let’s Encrypt” option. Similarly, Bluehost users can toggle the “Free SSL” option within the “My Sites > Security” tab of their proprietary dashboard. This action triggers the server to fetch a certificate and bind it to port 443.6
Verification of Server-Side SSL
Before activating any WordPress plugins, the administrator should verify that the certificate is correctly installed on the server. This can be done by manually typing https://yourdomain.com into a browser. If the page loads (even with layout errors or missing images), the certificate is active. If the browser returns a connection error, the server-side SSL is not yet propagated.
After securing the server, WordPress will have to know about the change in the protocol. The standard in this configuration step is the Really Simple SSL. It performs the role of an orchestrator, matching the WordPress database and configuration files to the new security state of the server.
The Activation Sequence
On installing and enabling, Really Simple SSL runs a scan through the server environment to determine whether there is an authentic certificateis present. In case it is detected, it offers a configuration button, which is usually named Activate SSL. A complicated chain of automatic operations is launched by clicking on this:
The Dynamic Mixed Content Fixer
A distinct advantage of Really Simple SSL is its handling of mixed content, a scenario where a secure page loads insecure resources (images, scripts). Rather than performing a risky search-and-replace operation on the database, the plugin utilizes output buffering. It intercepts the HTML page as the server is generating it, scans for http:// references to the site’s domain, and dynamically rewrites them to https:// before sending the response to the browser. This ensures the “Secure” padlock appears without permanently altering legacy data.
| Feature | Function | Benefit |
| Certificate Detection | Scans port 443 for valid certs | Prevents activation if SSL is broken |
| 301 Redirect | Server-level traffic rerouting | SEO preservation and forced security |
| Mixed Content Fixer | Dynamic HTML rewriting | instant green padlock without DB surgery |
| HSTS Header | Adds Strict-Transport-Security | Prevents protocol downgrade attacks |
Table 1: Core functionalities of the Really Simple SSL configuration engine.
In the case of an environment in which no free certificate interface is offered by the host, there are ACME clients such as WP Encryption and SSL Zen. They enable the WordPress administrator to issue a Let’s Encrypt certificate straight inside the WordPress panel. This approach involves a high level of technical interaction.
To issue a certificate, the Certificate Authority (Let’s Encrypt) must verify domain ownership. These plugins facilitate this verification via the ACME protocol, typically using the HTTP-01 challenge method.
The Mechanics of HTTP-01
In this challenge, the plugin contacts Let’s Encrypt and requests a certificate. Let’s Encrypt responds with a specific token (a string of characters). The plugin must then verify that it controls the web server by placing this token in a specific file path: http://yourdomain.com/.well-known/acme-challenge/<TOKEN>. Let’s Encrypt’s validation servers then attempt to download this file. If the file matches the expected token, ownership is verified, and the certificate is issued.
The WP Encryption plugin streamlines this process for beginners while retaining the necessary controls for experts.
Domain Registration
The user enters the domain name and an email address for expiry notifications. The plugin connects to the Let’s Encrypt staging environment to prepare the order.
Verification Strategy
The administrator is presented with the necessary token files. In the free version of the plugin, the automated placement of these files may be restricted on some hosts, requiring manual intervention. The user must use an FTP client or the hosting File Manager to create the .well-known and acme-challenge directories in the site root. The generated token files are then uploaded to this location. It is critical to verify that these files are publicly accessible via a browser before clicking the “Verify” button in the plugin.
Certificate Retrieval
Upon successful verification, the plugin downloads the cryptographic assets: certificate.crt (the public key), private.pem (the private key), and cabundle.crt (the intermediate chain). These files are stored securely within the WordPress uploads directory or offered for download to the administrator’s local machine.
A critical distinction in Method B is that generating the certificate is not the same as installing it. In the free tier of plugins like SSL Zen or WP Encryption, the plugin often lacks the permissions to write these files directly to the web server’s configuration (Apache/Nginx). The administrator must manually install them.
Manual Installation via cPanel
The primary drawback of Method B is the lifecycle management. Let’s Encrypt certificates are valid for 90 days. Users relying on the free versions of generation plugins must manually repeat the verification and installation process every 60 to 90 days. Failure to do so results in certificate expiry, causing browsers to block access to the site with a severe security warning. Premium versions of these plugins alleviate this by installing a cron job (scheduled task) to automate the renewal, but the free route demands disciplined manual maintenance.
A frequent point of failure for beginners utilizing Method B is the creation and management of the .well-known directory. This directory is essential for the HTTP-01 challenge, but it poses usability hurdles due to file system conventions.
In Linux and Unix-based systems (which power the vast majority of web servers), any file or directory name beginning with a dot (.) is treated as hidden. When a beginner uses the cPanel File Manager to create the .well-known folder, the folder often seems to disappear immediately upon creation. This is not an error; it is the default view behavior.
To interact with this directory, the administrator must explicitly configure the File Manager to display hidden files.
For WordPress sites hosted on Windows (IIS) servers, the operating system does not natively allow the creation of folders starting with a dot via the standard Explorer interface. The administrator must name the folder well-known and then use the IIS Manager to map a virtual directory alias of .well-known to that physical path. Alternatively, creating the folder via the command line (mkdir.well-known) bypasses the Explorer restriction.
For administrators who cannot modify server files or lack a hosting panel with SSL support, Cloudflare offers an alternative paradigm known as “Flexible SSL.” This method secures the connection at the network edge rather than at the Origin server.
Cloudflare operates as a reverse proxy, sitting between the internet and the WordPress server. In “Flexible” mode, the connection is split into two legs:
While Flexible SSL removes the “Not Secure” warning, it is a partial security solution. The data is unencrypted during the transit from Cloudflare to the hosting provider, leaving it vulnerable to interception by sophisticated attackers monitoring the backbone network. However, for a beginner blog with no sensitive transactional data, this risk is often deemed acceptable.33
The Redirect Loop Hazard
A common failure mode with Flexible SSL is the infinite redirect loop.
“Mixed Content” is the most prevalent post-installation issue. It occurs when the parent HTML page is loaded over HTTPS, but it requests sub-resources (images, scripts, stylesheets) via insecure HTTP addresses.
Browsers treat mixed content with varying degrees of severity.
While Really Simple SSL handles mixed content dynamically, a permanent fix is preferred for performance. The Better Search Replace plugin allows the administrator to perform a bulk update of the database.
Modern page builders like Elementor store absolute URLs in their own configuration files and CSS caches. A database search and replace may not catch these. Administrators must navigate to the specific “Tools” section of the page builder (e.g., Elementor > Tools > Replace URL) to update these references and regenerate the CSS files.
The installation of an SSL certificate is only the first step in a comprehensive security posture. To prevent protocol downgrade attacks—where an attacker forces the connection back to HTTP, Advanced security headers must be deployed.
HSTS is a directive sent by the server via a response header (Strict-Transport-Security). It instructs the browser to remember that the site should only be accessed via HTTPS for a specified duration (typically one year). Once a browser receives this header, it will automatically convert any future http:// requests to https:// internally, before the request is even sent to the network.
Implementation Risk
Plugins like Really Simple SSL (Pro) and WP Encryption offer a checkbox to enable HSTS. However, beginners must exercise extreme caution. If HSTS is enabled and the SSL certificate subsequently expires or becomes invalid, users will be completely locked out of the site. Browsers strictly enforce HSTS and do not allow users to “click through” the security warning. It is recommended to enable HSTS only after the SSL implementation has proven stable for several weeks.
The “Freemium” model dominates the WordPress SSL plugin ecosystem. Understanding the limitations of the free versions is crucial for long-term planning.
| Feature Set | Really Simple SSL (Free) | WP Encryption (Free) | SSL Zen (Free) | Pro / Premium Tiers |
| Primary Function | Configuration / Redirection | Generation / Installation | Generation / Installation | Automation & Monitoring |
| Certificate Source | Detects Existing | Let’s Encrypt | Let’s Encrypt | Let’s Encrypt / ZeroSSL |
| Renewal Mechanism | N/A (Relies on Host) | Manual (90 Days) | Manual (90 Days) | Automatic (Cron) |
| Mixed Content | Dynamic Fixer | Basic | Basic | Advanced Scanning |
| Security Headers | Basic | Basic | Basic | HSTS Preload list |
In business contexts, the price ofthe Pro license will usually exceed the labor cost of manual quarterly renewals. Nevertheless, when one is starting with zero money to spend, the free versions of WP Encryption or SSL Zen are a fully operational (although manual) way to security.
The shift of the WordPress environment to HTTPS is a complete standard. The options that an amateur can use today, such as the automated genius of the AutoSSL in cPanel or the manual accuracy of the WP Encryption makes sure that no site has to stay unprotected because of the price or difficulty.

Hassan Tahir wrote this article, drawing on his experience to clarify WordPress concepts and enhance developer understanding. Through his work, he aims to help both beginners and professionals refine their skills and tackle WordPress projects with greater confidence.


 Lifetime Hosting
 France Lifetime Dedicated Servers
 Germany Lifetime dedicated servers
 Lifetime Game Dedicated Servers
 Chicago, US
 Singapore
 Hong Kong
 Seoul, South Korea
 Amsterdem, Netherlands
 London, UK
 Zurich, Switzerland
 Sydney, Australia
 DDOS Protection
 Submit Ticket
 Full Management
 Videos and Podcasts
 Voxfor Advanced Price Management For WooCommerce
 Voxfor AI Content Summary


