
We will Learn how to Add Users in Linux in this article. Linux user management is important as it helps manage access, maintain security, and perform well in a multi-user environment. Suppose you want to add or manage users on Linux. In that case, this guide discusses every component — first, the simplest user creation commands, followed by in-depth methods for group and permission configuration.
Linux’s multi-user capabilities make it ideal for servers and systems that need secure, segmented access.
User management is fundamental in Linux for:
User management allows administrators to define which users can access specific files, execute commands, or install software.
Permissions and roles are the backbone of Linux security, defining access at both the user and group level. Linux permissions operate under three main categories:
Each category has read (r), write (w), and execute (x) permissions. Permissions are represented by a numeric code, where 7 is full access, 5 is read and executed, and so on.
Understanding these user types and permissions helps you set access controls appropriately.
Before adding users, make sure you have:
Linux provides two main commands for adding users: useradd and adduser. Each command has distinct features.
useradd is a core command in most Linux distributions and provides full control over user configuration.
sudo useradd [username]![using sudo useradd [username] to add a Linux user](https://www.voxfor.com/wp-content/uploads/2024/11/Adding-Users-with-useradd-2.png)
By default, this creates a user with minimal settings. Additional options allow for more customization:
Create Home Directory: Use -m to create a user’s home directory automatically.
sudo useradd -m [username]![Command sudo useradd -m [username] creates user with home directory](https://www.voxfor.com/wp-content/uploads/2024/11/Create-Home-Directory-1.png)
sudo useradd -d /custom/path [username]![Command sudo useradd -d /custom/path [username] sets custom home](https://www.voxfor.com/wp-content/uploads/2024/11/Custom-Home-Directory.png)
sudo useradd -s /bin/bash [username]![Command sudo useradd -s /bin/bash [username] sets default shell](https://www.voxfor.com/wp-content/uploads/2024/11/Default-Shell.png)
sudo useradd -e 2025-01-01 [username]![Command sudo useradd -e 2025-01-01 [username] sets expiration date](https://www.voxfor.com/wp-content/uploads/2024/11/Expiration-Date.png)
sudo useradd -g groupname [username]![Command sudo useradd -g groupname [username] sets primary group](https://www.voxfor.com/wp-content/uploads/2024/11/Primary-Group.png)
sudo useradd -G group1,group2 [username]![Command sudo useradd -G group1,group2 [username] adds to groups](https://www.voxfor.com/wp-content/uploads/2024/11/supplementary-groups.png)
adduser is a higher-level command available on Debian-based systems, providing an interactive approach.
sudo adduser [username]![Command sudo adduser [username] adds a user with interactive setup](https://www.voxfor.com/wp-content/uploads/2024/11/Adding-Users-with-adduser.png)
The command will cause it to ask you to type the user’s password, and other details, making it a nice option when you are looking to set up a user quickly.
User accounts can be configured with specific settings for home directories, shells, and expiration dates.
Specify a login shell at creation to control the user’s command interpreter:
sudo useradd -s /bin/zsh [username]![Command sudo useradd -s /bin/zsh [username] sets default shell with warning](https://www.voxfor.com/wp-content/uploads/2024/11/setting-default-shells.png)
An expiration date is useful for temporary users:
sudo useradd -e YYYY-MM-DD [username]![Command sudo useradd -e YYYY-MM-DD [username] sets user expiration date](https://www.voxfor.com/wp-content/uploads/2024/11/Setting-Expiration-Dates.png)
For existing users, use chage to adjust the expiration:
sudo chage -E YYYY-MM-DD [username]![Command sudo chage -E YYYY-MM-DD [username] sets account expiration](https://www.voxfor.com/wp-content/uploads/2024/11/use-change-to-modify-user.png)
To lock an account, preventing the user from logging in:
sudo usermod -L [username]![Command sudo usermod -L [username] locks a user account](https://www.voxfor.com/wp-content/uploads/2024/11/Locking-account.png)
To unlock an account:
sudo usermod -U [username]![Command sudo usermod -U [username] unlocks a user account with warning](https://www.voxfor.com/wp-content/uploads/2024/11/unlock-account-1.png)
These groups group users and define permissions shared for (files, directories, and commands).
Create a Group: Use groupadd to create a new group.
sudo groupadd [groupname]![Command sudo groupadd [groupname] creates a new user group](https://www.voxfor.com/wp-content/uploads/2024/11/create-a-group.png)
sudo usermod -aG [groupname] [username]![Command sudo usermod -aG [groupname] [username] adds user to group](https://www.voxfor.com/wp-content/uploads/2024/11/Add-a-User-to-a-Group-1.png)
sudo gpasswd -d [username] [groupname]groups [username]![Command groups [username] lists group memberships for a user](https://www.voxfor.com/wp-content/uploads/2024/11/check-group-members.png)
Passwords are very important for the user, and Linux has few options for controlling how passwords come to life.
To set or change a user’s password, use passwd:
sudo passwd [username]![Command sudo passwd [username] sets or changes a user password](https://www.voxfor.com/wp-content/uploads/2024/11/setting-initial-password.png)
Control password rules, including minimum length, complexity, and expiration, by configuring the /etc/login.defs file or using chage.
sudo chage -M 90 [username]
This command sets the password to expire every 90 days, requiring users to update it regularly.
Lock a user’s password without disabling the account:
sudo passwd -l [username]
Unlock it with:
sudo passwd -u [username]![Command sudo passwd -u [username] unlocks a user’s password with warning](https://www.voxfor.com/wp-content/uploads/2024/11/unlock-with-password.png)
Each user has a default environment that includes files, directories, and shell settings.
Files in /etc/skel are copied to a new user’s home directory upon creation. Add custom files to /etc/skel to set up a standardized environment for all users.
.bashrc 
or
.profile 
They are files in a user’s home directory that set environment variables, aliases, and preferences for command use by individual users.
For users with elevated responsibilities, control access with sudo privileges or restrict access to certain commands.
Granting permission elevated, add a user to the sudo group.
sudo usermod -aG sudo [username]
To limit which commands a user can execute with sudo, edit the /etc/sudoers file:
sudo visudo
Take care to define clear, specific commands under the user’s entry to control sudo access.
Linux file permissions use a numeric system to represent different levels of access for users, groups, and others.
Adjust file permissions using chmod:
sudo chmod 744 [filename]
This command gives the owner read, write, and execute permissions and allows all others to have read permissions.
Several key files store user and group information:


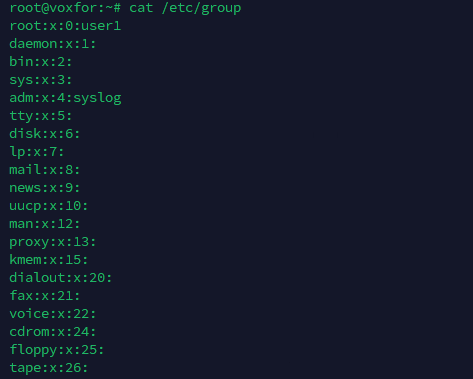

These files are critical for account management and should be handled carefully.
Automate user creation and management for efficient handling of large-scale systems.
Use a bash script to create multiple users from a file:
#!/bin/bash
while IFS=, read -r username
do
  sudo useradd "$username"
done < users_list.txt
Save the list of users in users_list.txt and run the script to automate the process.
Common problems involved with user management are login issues, permission errors, and grouping issues. When you address these things (verifying permissions, checking group memberships, reviewing expiration settings, etc.), it’ll speed things up.
Several GUI tools can simplify user management, including:
Linux user management is an essential skill for administrators, offering flexibility in configuring and securing user accounts. Following these detailed steps allows you to create, configure, and maintain user accounts effectively across various Linux environments.

Vinayak Baranwal wrote this article. Use the provided link to connect with Vinayak on LinkedIn for more insightful content or collaboration opportunities.


 Lifetime Hosting
 France Lifetime Dedicated Servers
 Germany Lifetime dedicated servers
 Lifetime Game Dedicated Servers
 Chicago, US
 Singapore
 Hong Kong
 Seoul, South Korea
 Amsterdem, Netherlands
 London, UK
 Zurich, Switzerland
 Sydney, Australia
 DDOS Protection
 Submit Ticket
 Full Management
 Videos and Podcasts
 Voxfor Advanced Price Management For WooCommerce
 Voxfor AI Content Summary


