Inbound Marketing Strategy
Helpful tutorials attract qualified visitors, but reliable hosting keeps those readers engaged. Voxfor VPS gives growing websites the speed, uptime, and control needed to support stronger inbound marketing campaigns.
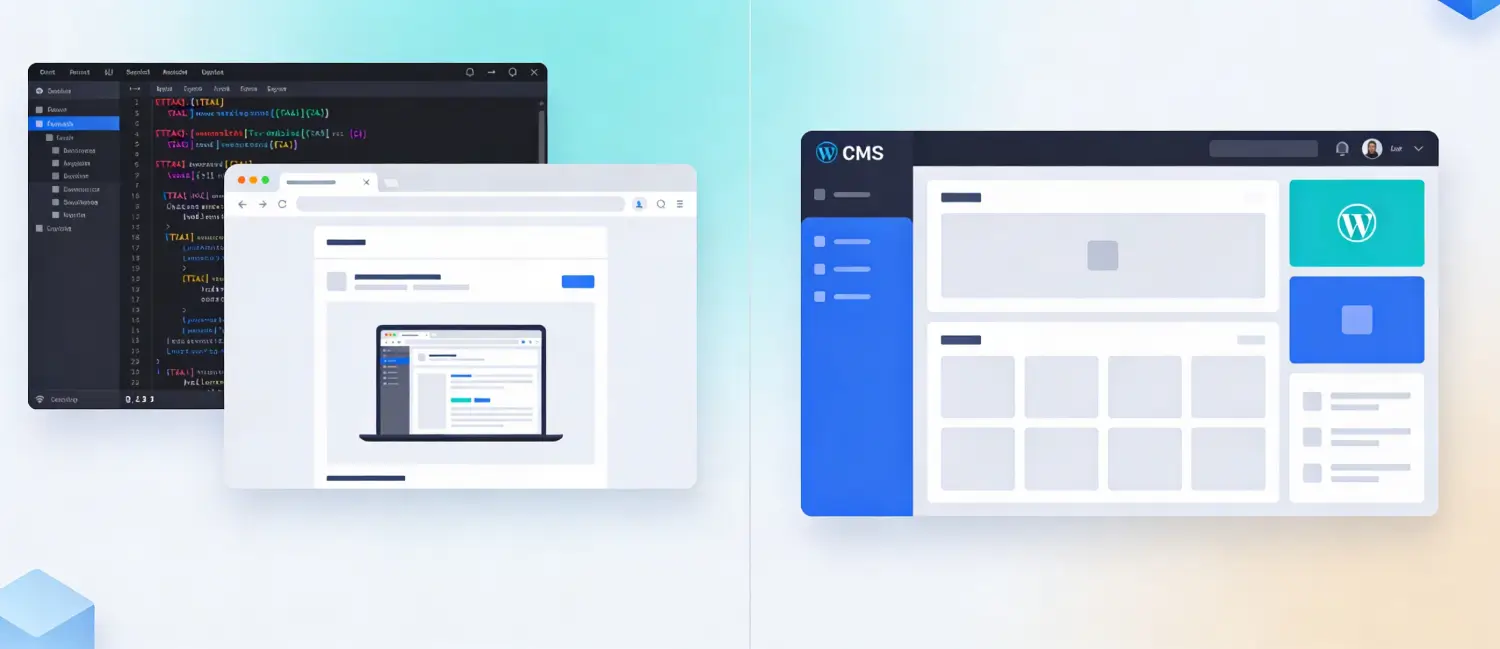
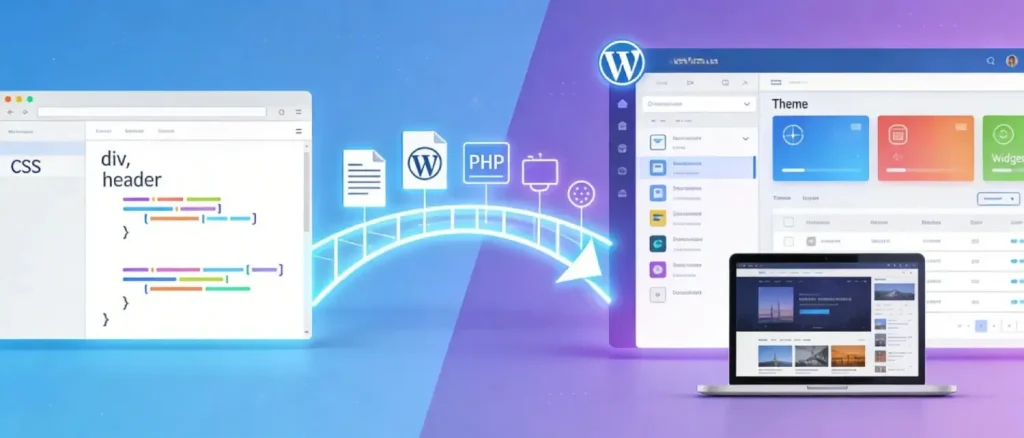
There is a charm in static HTML websites, and they load quickly and allow the designers absolute control. However, they have a significant drawback: each content update, regardless of the extent of its significance, has to be done manually in code. This is addressed by WordPress, which makes your static design dynamic and content manageable site. This guide takes you a step-by-step through all the options, including manual theme conversion, to plugin-powered migration, so that you can pick the correct approach to the level of skills and outcomes.
Before jumping into the process, it helps to understand exactly what you gain by making the switch.
Effortless content management: WordPress provides a user-friendly admin dashboard that lets you create posts, update pages, and manage media files without touching a single line of code. HTML websites require direct code edits for every update, which is time-consuming and technically demanding.
Scalability: WordPress enables you to add additional features through the use of plugins, work with several users, and increase the server resources to meet the increased traffic. This flexibility cannot be achieved with a mere HTML site.
SEO capabilities: WordPress is built with search engine optimization in mind. Plugins and built-in features make it significantly easier for search engines to crawl and rank your pages.
Plugin ecosystem: With thousands of plugins available, you can add contact forms, e-commerce functionality, security features, caching, and analytics, all without custom development.
Dynamic content: WordPress dynamically generates HTML from a database, meaning a single template controls the layout of hundreds of pages simultaneously. An HTML site requires a separate file for each page.
Hurrying to convert without due preparation usually leaves shattered styles, missing pictures and structural mess. These steps need to be followed first.
Check your HTML files, look for mistakes, old-fashioned code, and bloat. Check structural problems with an HTML validator (e.g., W3C Markup Validation Service). Eliminate needless items, reduce redundant code, and make images smaller to reduce load times.
Your HTML should already use semantic elements such as `<header>`, `<nav>`, `<main>`, `<article>`, `<aside>`, and `<footer>`. These elements map directly to WordPress theme files. If your HTML is a flat, unstructured pile of `<div>` tags, take time to reorganize it before proceeding, it will make the conversion far smoother.
WordPress powers websites accessed on all screen sizes. If your HTML site is not already responsive, apply a responsive CSS framework such as Bootstrap or use media queries to adapt the layout for mobile, tablet, and desktop. A non-responsive design carried over to WordPress will underperform in both user experience and SEO rankings.
You should have a full backup of all your HTML files, CSS, images and JavaScript before you make any changes. This safety net is essential, in case of a breakdown in conversion, you can always go back to the original.
When you are starting with the development of your theme in WordPress, it is highly advisable to develop your converted theme on a local machine like XAMPP or LocalWP and then deploy it to a live server. This allows you to test without compromising a live website.
The WordPress themes are not the HTML files; they are modular, and each part of a page is stored in its own PHP template. This structure is important to know before you begin to convert.
| File | Purpose |
| style.css | Main stylesheet; also contains the theme header metadata that WordPress reads to recognize the theme |
| index.php | The fallback template is used when no more specific template exists; it contains The Loop |
| header.php | Contains the HTML <head> section and the opening <body> markup, including the site’s navigation |
| footer.php | Contains the closing footer HTML, wp_footer() hook, and </body> / </html> tags |
| sidebar.php | Contains the <aside> section with widget areas |
| functions.php | Theme’s “control center” registers menus, enqueues scripts and styles, and activates WordPress features |
| page.php | Default template for static pages (About, Contact, Services) |
| single.php | Template for individual blog posts |
| 404.php | Displayed when a requested page is not found |
WordPress uses a Template Hierarchy to determine which file to load for any given URL. If a specific template file does not exist, WordPress falls back through the hierarchy until it reaches index.php.
Three major methods exist for changing an HTML site into WordPress. The correct option would be determined by your technical level of comfort, time, and the extent to which you requireit to be similar to your original design.
This is the most powerful and technical method. It involves breaking your HTML files into separate PHP template files that WordPress can assemble dynamically. It gives you complete control over the output and is the best choice if you want your WordPress site to look exactly like your original HTML design.
Navigate to your WordPress installation’s wp-content/themes/ directory and create a new folder. Name it something descriptive and unique, for example, my-custom-theme (no spaces).
Inside this folder, create the following files:
The style.css file must begin with a special comment block that tells WordPress to recognize your folder as a valid theme. Without this, your theme will not appear in the WordPress Themes panel.
/*
Theme Name: My Custom Theme
Theme URI: https://yourwebsite.com/
Author: Your Name
Author URI: https://yourwebsite.com/
Description: A custom WordPress theme converted from HTML.
Version: 1.0
License: GNU General Public License v2 or later
License URI: http://www.gnu.org/licenses/gpl-2.0.html
*/
After this block, paste in all the CSS rules from your original HTML site’s stylesheet.
Open your original HTML file and divide it into sections corresponding to the WordPress template files.
header.php: Copy everything from the <!DOCTYPE html> declaration down to (but not including) your main content area. This includes the <head> section, navigation, and the opening of your content wrapper.
Critically, add <?php wp_head(); ?> just before the closing </head> tag. This is mandatory; it allows WordPress plugins to inject their stylesheets and scripts into your theme.
<!DOCTYPE html>
<html <?php language_attributes(); ?>>
<head>
    <meta charset="<?php bloginfo('charset'); ?>">
    <meta name="viewport" content="width=device-width, initial-scale=1">
    <title><?php wp_title('|', true, 'right'); ?><?php bloginfo('name'); ?></title>
    >/style.css" type="text/css" media="all" />
    <?php wp_head(); ?>
</head>
<body>
<div class="header-container">
    <header>
        <h1 class="site-title"><?php bloginfo('name'); ?></h1>
        <nav>
            <?php wp_nav_menu(array('theme_location' => 'primary-menu')); ?>
        </nav>
    </header>
</div>
<div class="main-container">
    <main class="main wrapper">
Note the use of get_template_directory_uri() for the stylesheet link and wp_nav_menu() for dynamic navigation, these replace the hardcoded equivalents from your original HTML.
**footer.php:** Copy everything from the end of your main content area through the closing `</html>` tag. Add `<?php wp_footer(); ?>` just before the closing `</body>` tag.
</main>
</div>
<div class="footer-container">
<footer class="wrapper">
<p>© <?php echo date('Y'); ?> <?php bloginfo('name'); ?></p>
</footer>
</div>
<?php wp_footer(); ?>
</body>
</html>sidebar.php: Copy the content from your <aside> section into this file.
The index.php file is the core of your theme. It calls the header, sidebar, and footer files, and uses The Loop, WordPress’s mechanism for querying and displaying posts or pages.
<?php get_header(); ?>

<?php while (have_posts()) : the_post(); ?>
    <article class="<?php post_class(); ?>" id="post-<?php the_ID(); ?>">
        <h2 class="entry-title"><?php the_title(); ?></h2>
        <?php if (!is_page()) : ?>
        <section class="entry-meta">
            <p>Posted on <?php the_date(); ?> by <?php the_author(); ?></p>
        </section>
        <?php endif; ?>
        <section class="entry-content">
            <?php the_content(); ?>
        </section>
        <section class="entry-meta">
            <?php if (count(get_the_category())) : ?>
            <span class="category-links">
                Posted under: <?php echo get_the_category_list(', '); ?>
            </span>
            <?php endif; ?>
        </section>
    </article>
<?php endwhile; ?>

<?php get_sidebar(); ?>
<?php get_footer(); ?>The functions.php file is where you register theme features, enqueue scripts and stylesheets, and tell WordPress about your navigation menus.
<?php

function my_theme_setup() {
    // Register navigation menus
    register_nav_menus(array(
        'primary-menu' => __('Primary Menu', 'my-custom-theme'),
        'footer-menu'  => __('Footer Menu', 'my-custom-theme'),
    ));

    // Enable featured images
    add_theme_support('post-thumbnails');

    // Enable title tag
    add_theme_support('title-tag');
}
add_action('after_setup_theme', 'my_theme_setup');

// Enqueue styles and scripts
function my_theme_enqueue_assets() {
    wp_enqueue_style(
        'my-theme-style',
        get_template_directory_uri() . '/style.css',
        array(),
        '1.0.0'
    );

    wp_enqueue_script(
        'my-theme-script',
        get_template_directory_uri() . '/assets/js/main.js',
        array('jquery'),
        '1.0.0',
        true
    );
}
add_action('wp_enqueue_scripts', 'my_theme_enqueue_assets');

// Register sidebar widget area
function my_theme_widgets_init() {
    register_sidebar(array(
        'name'          => __('Primary Sidebar', 'my-custom-theme'),
        'id'            => 'primary-sidebar',
        'description'   => __('Widgets in this area will be shown on all posts and pages.', 'my-custom-theme'),
        'before_widget' => '<div id="%1$s" class="widget %2$s">',
        'after_widget'  => '</div>',
        'before_title'  => '<h3 class="widget-title">',
        'after_title'   => '</h3>',
    ));
}
add_action('widgets_init', 'my_theme_widgets_init');
Always use wp_enqueue_style() and wp_enqueue_script() to load assets, hardcoding > or <script> tags directly in template files is considered poor practice and can cause conflicts with plugins.
WordPress displays an 880×660 pixel screenshot to represent your theme in the admin panel. Take a screenshot of your design in a browser, crop it to those dimensions, save it as screenshot.png, and place it inside your theme folder.
To upload your theme, compress the entire theme folder into a .zip file. Then go to Appearance → Themes → Add New → Upload Theme in your WordPress dashboard and select the zip file. After installation, click Activate to make it your active theme.
Alternatively, you can upload the theme folder directly to wp-content/themes/ via an FTP client such as FileZilla, without zipping.
If you do not want to build a theme entirely from scratch, this method uses an existing WordPress parent theme as a foundation and layers your HTML design on top of it via a child theme. It is the fastest route to a functional WordPress site, and it gives you access to the parent theme’s full feature set immediately.
Select a WordPress theme whose layout closely matches your HTML site. Look for themes with similar column structures, header positions, and navigation patterns. Popular frameworks like Underscores (_s), GeneratePress, or Astra work well as parent themes for this purpose.
In wp-content/themes/, create a new folder using the parent theme’s folder name with -child as a suffix. For example, if the parent theme folder is GeneratePress, your child folder should be named generatepress-child. Avoid spaces in the folder name.
Inside your child theme folder, create a style.css file with the following header:
/*
Theme Name: GeneratePress Child
Theme URI: https://yourwebsite.com/
Description: Child theme for GeneratePress.
Author: Your Name
Author URI: https://yourwebsite.com/
Template: generatepress
Version: 1.0.0
License: GNU General Public License v2 or later
License URI: http://www.gnu.org/licenses/gpl-2.0.html
*/
The Template: line must match the parent theme’s folder name exactly, this is what establishes the parent-child relationship.
Create a functions.php file in the child theme folder. Use it to enqueue the parent theme’s stylesheet before your own, so your custom styles can override the parent’s defaults:
<?php

function child_theme_enqueue_styles() {
    $parent_style = 'parent-style';

    wp_enqueue_style($parent_style,
        get_template_directory_uri() . '/style.css'
    );

    wp_enqueue_style('child-style',
        get_stylesheet_directory_uri() . '/style.css',
        array($parent_style),
        wp_get_theme()->get('Version')
    );
}
add_action('wp_enqueue_scripts', 'child_theme_enqueue_styles');Compress the child theme folder into a .zip file and upload it via Appearance → Themes → Add New → Upload Theme. After activating the child theme, manually transfer your HTML content into WordPress pages and posts, applying your original styles where needed.
This is the least technical method, but also the most limited in scope. Plugin-based conversion is best suited for simple sites with primarily static content, where you want to migrate text and structure into WordPress pages rather than recreating a full custom theme.
From your WordPress dashboard, go to Plugins → Add New and search for HTML Import 2 by Stephanie Leary. Install and activate it.
Other plugins that can assist with HTML content migration include WP All Import and WP File Manager.
Note: The HTML Import 2 plugin has not been updated in some time. Always test it on a staging environment before using it on a live site, and verify compatibility with your current WordPress version.
The plugin provides several configuration tabs:
<div id="main">, enter div in the first field, id in the second, and main in the third.After configuring all settings, save them and click Import Files. Choose whether to import an entire directory of files or a single file, then click Submit. WordPress will create pages or posts based on the imported HTML content.
Regardless of which method you use for theme conversion, your actual content, text, images, and links may still need to be migrated.
Manual content migration is the most reliable approach, especially for small-to-medium sites. For each page on your old HTML site:
Permalink matching: Before you begin migration, configure WordPress permalinks (Settings → Permalinks) to match the URL structure of your old HTML site. This reduces the number of 301 redirects you will need to set up.
Setting up 301 redirects: After migration, create 301 redirects from your old HTML page URLs to the new WordPress URLs. This preserves SEO link equity and ensures visitors who bookmarked old pages are not met with 404 errors. The Redirection plugin or directives in your .htaccess file are common approaches.
Once your theme and content are live, work through the following checklist before going public.
Even careful conversions can produce unexpected issues. Here are the most common problems and their solutions.
If images are not displaying, the paths from your original HTML site no longer point to valid locations in your WordPress theme directory. Correct this by using WordPress get_template_directory_uri() function in your PHP template files to generate dynamic, server-agnostic paths:
<img src="<?php echo get_template_directory_uri(); ?>/images/hero.jpg" alt="Hero Image">For images in your CSS background-image properties, use relative paths from the stylesheet location, typically ../images/filename.jpg, or enqueue the stylesheet correctly so WordPress can resolve relative URLs.
If your theme looks unstyled or partially broken, there are several causes to investigate:
Some plugins may interfere with your theme’s CSS or JavaScript. Diagnose this by deactivating all plugins and reactivating them one by one until the issue reappears. The most recently activated plugin is almost always the source of the conflict.
If the wrong template is loading for a given page, review the WordPress Template Hierarchy. Ensure your template files are named correctly (e.g., page.php for static pages, single.php for posts) and placed in the root of your theme folder. Use a plugin like Query Monitor to debug which template file WordPress is loading for any given URL.
Navigation Menu Not Showing
If your navigation menu is blank, ensure you have:
After completing the basic conversion, consider these enhancements to improve functionality and maintainability.
Add custom page templates: If different pages on your HTML site have different layouts, create dedicated template files such as page-about.php or template-fullwidth.php. This gives each page its own layout without duplicating code.
Integrate the Customizer: Use the WordPress Customizer API in functions.php to allow site colors, fonts, and logos to be changed from the admin panel without touching code.
Use wp_nav_menu() for all navigation: Rather than hardcoding menu items in header.php, use wp_nav_menu() so menus can be updated from Appearance → Menus. This is the industry standard for WordPress theme development.
Register widget areas: If your HTML site has a sidebar or footer with distinct content zones, register those as widget areas in functions.php using register_sidebar(). This makes them manageable from Appearance → Widgets.
Optimize for performance: Minimize and combine your CSS and JavaScript files. Use a caching plugin to generate static versions of your pages. Serve images via WordPress responsive image functions (the_post_thumbnail() with wp_get_attachment_image_srcset()) to automatically deliver appropriately sized images to different devices.
Converting an HTML website to WordPress is an investment that pays dividends in content management efficiency, scalability, and long-term maintainability. The manual method, building a custom theme from scratch, demands technical effort but delivers the highest fidelity to your original design. The child theme method is faster and ideal for those comfortable adapting an existing foundation. Plugin-based import suits simple content migrations where design recreation is handled separately.
Whichever method you choose, the preparation steps are universal: clean your HTML, ensure responsiveness, back up your files, and test in a local environment first. After conversion, completing the post-migration checklist, including 301 redirects, SEO configuration, and plugin setup, ensures your site continues to perform as well as, or better than, its HTML predecessor.

Hassan Tahir wrote this article, drawing on his experience to clarify WordPress concepts and enhance developer understanding. Through his work, he aims to help both beginners and professionals refine their skills and tackle WordPress projects with greater confidence.


 Lifetime VPS Europe
 Lifetime VPS Asia
 Lifetime Hosting
 France Lifetime Dedicated Servers
 Germany Lifetime dedicated servers
 Lifetime Game Dedicated Servers
 Chicago, US
 Singapore
 Hong Kong
 Seoul, South Korea
 Amsterdem, Netherlands
 London, UK
 Zurich, Switzerland
 Sydney, Australia
 DDOS Protection
 Submit Ticket
 Full Management
 Videos and Podcasts
 Voxfor Advanced Price Management For WooCommerce
 Voxfor AI Content Summary


