
A smooth workflow system within software development remains essential for current corporate industries. The modern work environment depends on Version Control, a system that organizes teams by making them safer and more effective together. Git stands as the most widespread distributed version control system and is a powerful tool that enables businesses worldwide to perform robust change management and tracking on their projects, thereby enhancing their productivity and collaboration.
Git-to-deploy workflow
Once your upstream branch is configured, deployment should be just as controlled. Voxfor VPS gives development teams a stable server environment for staging, testing, and shipping web applications.
People who are new to Git upstream setup find it difficult to understand its functions. The following guide establishes the significance of this topic so developers can implement it effectively throughout their software development work. The step-by-step framework aims to teach you the critical advantages of upstream branch in Git , which support effective team cooperation and conflict reduction during process coordination. Your essential part in this process receives our strategic assistance at every stage.
Open this extensive guide to learn step-by-step procedures for establishing an upstream branch that connects your local branches to their remote peers. Applying these insights will remove your uncertainties about commit locations while making branch selection for push and pull operations unnecessary. When your projects operate within a single system it results in better efficiency alongside standardized practices which cover the entire project development process.
The collaboration groups implement version control algorithms that monitor and oversee modifications to all project documents along with source code files. The system records detailed records of all modifications, which enables easy return to prior states when needed. The collaborative setting benefits from version control because it maintains safe parallel development between different programmers followed by required code merging.
The distributed architecture of Git provides developers with a local complete version of the repository which drastically lowers the exposure to server failures and networking problems. Developers maintain development independence through a nimble branching model since isolated experiments occur in separate branches that never disrupt the stability of the main codebase. The main branch can accept stable changes either through merging the branches or rebasing the work to stay consistent among developers.
Local commits, merges, and other operations are fast because they require no remote server calls. This efficiency instills confidence in your workflow.
An upstream branch refers to a remote branch that your local branch tracks. The local branch upstream branch acts as the standard destination when using git pull or git push commands lacking a target. A local branch requires an upstream branch to establish a home base for Git that identifies its change destination.
Some may call it a tracking branch or remote-tracking branch. Regardless of terminology, the function remains the same: it simplifies your workflow by tying local and remote branches together. Once the relationship is established, you no longer need to type git push Origin feature/new-feature each time—just git push will do.
Consider a local branch named feature/user-auth that tracks the remote branch Origin/feature/user-auth. In this scenario, all git pull commands fetch and merge remote changes from Origin/feature/user-auth directly into your local feature/user-auth branch. Likewise, a simple git push uploads your local commits to that exact remote branch. This reliability and consistency minimize errors and confusion for both solo developers and larger teams.
Some developers see upstream branch definition as useless; thu,s they dismiss the need to establish it because they intend to enter remote references manually. The technical feasibility of manual remote reference specification exists, ts but implementing this method proves ineffective for both efficiency and practicality. The defined upstream branch delivers various important advantages.
Before setting up an upstream branch, confirm the following:
The proper setup acts as the fundamental operational base,e which makes Git perform more efficiently. Check your name registration and that the email authentication method matches your proper settings because incorrect configurations could cause authorization and confusion issues.
Open a terminal or command prompt and run:
git --version
You should see something like git version 2.40.0 (or higher).
Git uses the name and email you provide to label your commits:
Git config --global user. Name "Your Name"
Git config --global user.email "[email protected]"To review your current Git settings:
git config --list
This shows details such as your username, email, and various other global configurations.
Repository (Repo): A project folder tracked by Git.
Remote: The server-based counterpart of your local repository, often hosted on platforms like GitHub.
Local Branch: A branch that exists on your local machine.
Remote Branch: A branch reference on the remote repository (e.g., Origin/main).
HEAD: Points to your current branch or commit.
Staging Area (Index): The index where you stage changes before committing.
Commit: A snapshot of your changes at a particular point in time.
Upstream branches need remote repositories for their creation process. The following demonstration shows how to set up an upstream repository through GitHub with equivalent Bitbucket and GitLab procedures.
GitHub then provides a remote URL, typically in SSH form:
[email protected]:username/my-project.git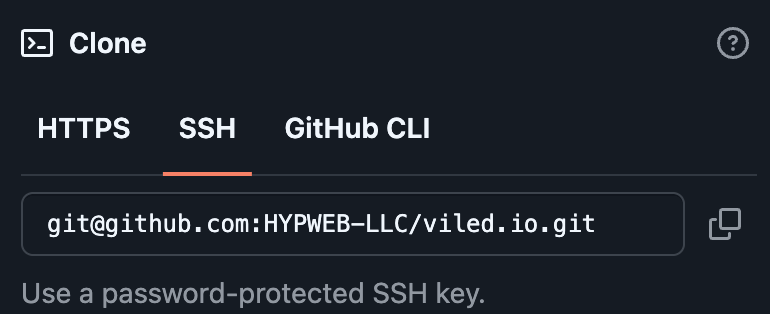
Or HTTPS form:
https://github.com/username/my-project.gitOption A: Add Remote to Existing Project
Navigate to your project folder:
Cd path/to/project
git init
Git add.
git commit -m "Initial commit"
git remote add Origin [email protected]:username/my-project.gitOne of the most common workflows in Git is creating a new feature branch, pushing it to the remote, and collaborating with your team.
Git checkout main
git pull Origin main
This ensures your local main is fully up to date.
Create and switch to a new branch:
git checkout -b feature/new-cool-feature
The -b option creates a new local branch.
Git add.
Git commit -m "Implement a new cool feature."
git push -u Origin feature/new-cool-feature
The -u parameter (or –set-upstream) tells Git that this local branch tracks Origin/feature/new-cool-feature.
Use:
Git branch -vv
You’ll see your branch followed by [Origin/feature/new-cool-feature], confirming that your local branch is set to track the remote branch of the same name.
Sometimes, a colleague has already created a remote branch, and you want to work on it locally. Here’s how:
Fetch the latest remote branches:
git fetch
Git checkout -b feature/new-cool-feature Origin/feature/new-cool-feature
If your local branch has an upstream, staying synchronized is easy:
git pull
This fetches and merges changes from the remote branch you’re tracking. If you prefer a linear history, use rebase:
Git pull --rebase
When merge conflicts arise, Git pauses the merge or rebase, allowing you to resolve conflicts. After fixing the conflicting files:
Git add.
git commit
And if you were rebasing:
Git rebase --continue
Thanks to your established upstream relationship, pushing local commits is straightforward:
git push
Git already knows where to push your work. If it’s your first time pushing a new local branch, set the upstream with:
Git push -u Origin feature/another-feature
Sometimes, you want your local branch to track a different remote branch. Here’s how to reassign it:
Check out your local branch:
Git checkout feature/new-cool-feature
Git branch -u Origin/feature/renamed-feature
To confirm, run:
Git branch -vv
The performance of operations related to merging or rebasing improves since an upstream branch can maintain your branch’s updated condition with new transformations from different branches.
Pull the latest changes:
Git pull Origin feature/new-cool-feature
Git checkout main
git merge feature/new-cool-feature
If you prefer a linear commit history, rebase your feature branch onto the main:
Git checkout feature/new-cool-feature
git pull --rebase Origin main
After this, your feature branch is rebased atop the latest main commits.
The Git system requires upstream branch configuration to establish an efficient version control workflow. Your organization achieves better team collaboration and minimizes both uncertainty and user mistakes when you establish direct links between local and remote branches.
Daily development tasks require fewer complications because upstream branches provide constructs for checking the latest cod,e followed by conflict-free rebasing and merging processes. They also lend themselves seamlessly to advanced practices like continuous integration, automated merges, and carefully controlled feature rollouts via feature flags.
The present environment where business success relies on speed and innovation demands a properly organized Git workflow. The combination of best practic, es which include simple naming methods and frequent remote database synchronization along with controlled branch management, ent allows teams to maintain secure codebases as they quicken their feature creation process. Your team will be able to devote their energy to creating excellent code thanks to learning these techniques,ues which eliminate version control problems.
This guide offers principles that work for independent developers and teams from multinational corporations to improve their Git methodology. Frequent reviews of this knowledge provide refreshments when necessary, and your colleagues should follow suit. A strong upstream usage by everyone within a workforce creates better development cultures through fewer errors and releases that flow smoothly.
Happy coding, and may your branches always align with the upstream you intend!

Vinayak Baranwal wrote this article. Use the provided link to connect with Vinayak on LinkedIn for more insightful content or collaboration opportunities


 Lifetime VPS Europe
 Lifetime VPS Asia
 Lifetime Hosting
 France Lifetime Dedicated Servers
 Germany Lifetime dedicated servers
 Lifetime Game Dedicated Servers
 Chicago, US
 Singapore
 Hong Kong
 Seoul, South Korea
 Amsterdem, Netherlands
 London, UK
 Zurich, Switzerland
 Sydney, Australia
 DDOS Protection
 Submit Ticket
 Full Management
 Videos and Podcasts
 Voxfor Advanced Price Management For WooCommerce
 Voxfor AI Content Summary


